添加旋转
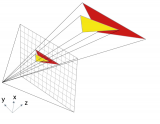
按照上面的算法我们只能看到北面。不同的角度需要多行代码来旋转坐标。
def Render(p, phi, height, horizon, scale_height, distance, screen_width, screen_height):
# precalculate viewing angle parameters
var sinphi = math.sin(phi);
var cosphi = math.cos(phi);
# Draw from back to the front (high z coordinate to low z coordinate)
for z in range(distance, 1, -1):
# Find line on map. This calculation corresponds to a field of view of 90°
pleft = Point(
(-cosphi*z - sinphi*z) + p.x,
( sinphi*z - cosphi*z) + p.y)
pright = Point(
( cosphi*z - sinphi*z) + p.x,
(-sinphi*z - cosphi*z) + p.y)
# segment the line
dx = (pright.x - pleft.x) / screen_width
dy = (pright.y - pleft.y) / screen_width
# Raster line and draw a vertical line for each segment
for i in range(0, screen_width):
height_on_screen = (height - heightmap[pleft.x, pleft.y]) / z * scale_height. + horizon
DrawVerticalLine(i, height_on_screen, screen_height, colormap[pleft.x, pleft.y])
p1eft.x += dx
p1eft.y += dy
# Call the render function with the camera parameters:
# position, viewing angle, height, horizon line position,
# scaling factor for the height, the largest distance,
# screen width and the screen height parameter
Render( Point(0, 0), 0, 50, 120, 120, 300, 800, 600 )
123456789101112131415161718192021222324252627282930313233
更多的性能说明
当然,要想达到更高的性能,还有很多小技巧可以使用。
与从后面到前面绘制相比,从前面到后面进行绘制会更好。优点之一就是我们不必每次都因为遮挡而需要在屏幕的底部画线。但是,为了保证遮挡,我们需要一个额外的Y缓冲区。对于每一列来说,相当于y的最高位置已经存储了。因为我们是按照从前面到后面这个顺序进行绘制的,那么下一行的可见部分只能大于先前绘制的最高行。
详细的渲染程度。前面的细节渲染多一点,远处的细节渲染的少一点。
def Render(p, phi, height, horizon, scale_height, distance, screen_width, screen_height):
# precalculate viewing angle parameters
var sinphi = math.sin(phi);
var cosphi = math.cos(phi);
# initialize visibility array. Y position for each column on screen
ybuffer = np.zeros(screen_width)
for i in range(0, screen_width):
ybuffer[i] = screen_height
# Draw from front to the back (low z coordinate to high z coordinate)
dz = 1.
z = 1.
while z 《 distance
# Find line on map. This calculation corresponds to a field of view of 90°
pleft = Point(
(-cosphi*z - sinphi*z) + p.x,
( sinphi*z - cosphi*z) + p.y)
pright = Point(
( cosphi*z - sinphi*z) + p.x,
(-sinphi*z - cosphi*z) + p.y)
# segment the line
dx = (pright.x - pleft.x) / screen_width
dy = (pright.y - pleft.y) / screen_width
# Raster line and draw a vertical line for each segment
for i in range(0, screen_width):
height_on_screen = (height - heightmap[pleft.x, pleft.y]) / z * scale_height. + horizon
DrawVerticalLine(i, height_on_screen, ybuffer[i], colormap[pleft.x, pleft.y])
if height_on_screen 《 ybuffer[i]:
ybuffer[i] = heightonscreen
p1eft.x += dx
p1eft.y += dy
# Go to next line and increase step size when you are far away
z += dz
dz += 0.2
# Call the render function with the camera parameters:
# position, viewing angle, height, horizon line position,
# scaling factor for the height, the largest distance,
# screen width and the screen height parameter
Render( Point(0, 0), 0, 50, 120, 120, 300, 800, 600 )
 电子发烧友App


评论