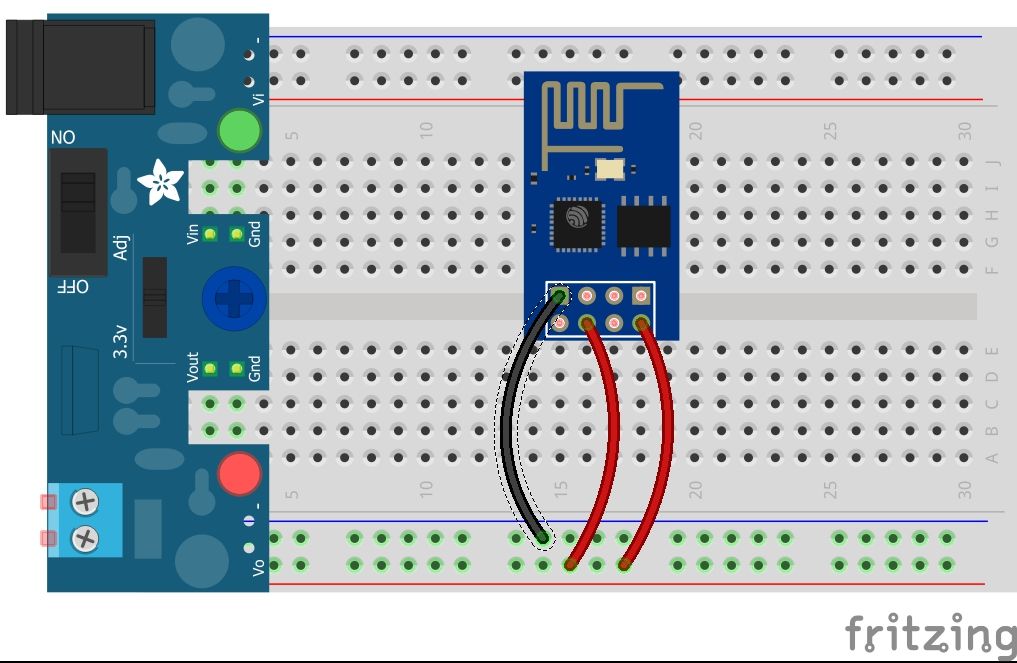
步骤1:代码

#include
//IP or name of address root: ie: google.com
//NOT google.com/nothing/after/the/dotcom.html
const char* hostGet = “mydatasite.com”;
void postData() {
WiFiClient clientGet;
const int httpGetPort = 80;
//the path and file to send the data to:
String urlGet = “/data/collector.php”;
// We now create and add parameters:
String src = “ESP”;
String typ = “flt”;
String nam = “temp”;
String vint = “92”;
urlGet += “?src=” + src + “&typ=” + typ + “&nam=” + nam + “&int=” + vint;
Serial.print(“》》》 Connecting to host: ”);
Serial.println(hostGet);
if (!clientGet.connect(hostGet, httpGetPort)) {
Serial.print(“Connection failed: ”);
Serial.print(hostGet);
} else {
clientGet.println(“GET ” + urlGet + “ HTTP/1.1”);
clientGet.print(“Host: ”);
clientGet.println(hostGet);
clientGet.println(“User-Agent: ESP8266/1.0”);
clientGet.println(“Connection: close ”);
unsigned long timeoutP = millis();
while (clientGet.available() == 0) {
if (millis() - timeoutP 》 10000) {
Serial.print(“》》》 Client Timeout: ”);
Serial.println(hostGet);
clientGet.stop();
return;
}
}
//just checks the 1st line of the server response. Could be expanded if needed.
while(clientGet.available()){
String retLine = clientGet.readStringUntil(‘ ’);
Serial.println(retLine);
break;
}
} //end client connection if else
Serial.print(“》》》 Closing host: ”);
Serial.println(hostGet);
clientGet.stop();
}
void setup() {
Serial.begin(115200);
}
void loop() {
postData();
delay(10000);
}
第2步:上传您的代码
您将需要更新许多参数,并从此处添加WiFiCon()函数(或相似的东西)。需要更改的参数是主机,URL和数据参数-我们将在解释步骤中进行介绍。
在Arduino IDE中打开串行监视器。这样,一旦您的代码上传,我们就可以看到来自ESP的串行消息。
使用此处设置的设置上传代码。
代码上传完毕后,您应该立即开始在串行监视器中看到一些消息。如果不这样做,请关闭ESP的电源,关闭闪光灯模式的开关,然后重新给ESP供电。
代码上传后,实际运行ESP所需的操作就是该指导顶部的简单接线。
步骤3:说明
发布数据的GET方法比POST方法简单一些,并且可以满足您的大多数需求。 GET的好处是,您只需将数据构建到URL字符串中即可。
假设您要将数据发送到名为mysite.com的站点。
它有一个处理数据的页面,称为data.php。
您有两个要发送的数据:name和id。
如果将data.php设置为解析名为“ name”和“ id”的变量,则需要生成的URL为:
mysite.com/data。 php?name = Jimmy&id = 52
请注意,变量与页面之间用?隔开,而彼此之间用&隔开。您可以通过这种方式发送很多变量-但是GET往往最适合简单数据类型。如果您需要发送长文本或更复杂的内容,那么我们需要看一下POST方法。
责任编辑:wv
-
Web服务器
+关注
关注
0文章
138浏览量
24365
发布评论请先 登录
相关推荐


 如何使用GET将数据发送到Web服务器


评论