 使用OpenCV+ONNXRuntime部署YOLOV7目标检测
简单说明
分别使用OpenCV、ONNXRuntime部署YOLOV7目标检测,一共包含12个onnx模型,依然是包含C++和Python两个版本的程序。 编写这套YOLOV7的程序,跟此前编写的YOLOV6的程序,大部分源码是相同的,区别仅仅在于图片预处理的过程不一样。YOLOV7的图片预处理是BGR2RGB+不保持高宽比的resize+除以255 由于onnx文件太多,无法直接上传到仓库里,需要从百度云盘下载,

YOLOV7的训练源码是:

跟YOLOR是同一个作者的。
OpenCV+YOLOv7
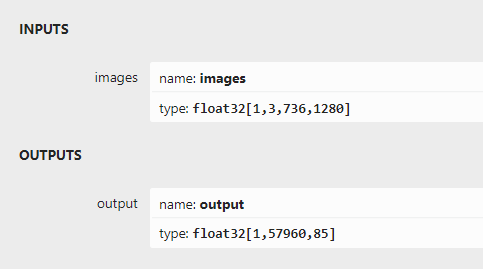
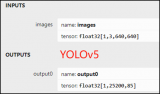
推理过程跟之前的YOLO系列部署代码可以大部分重用!这里就不在赘述了,详细看源码如下:输出部分直接解析最后一个输出层就好啦!
详细实现代码如下:
#include#include #include #include #include #include usingnamespacecv; usingnamespacednn; usingnamespacestd; structNet_config { floatconfThreshold;//Confidencethreshold floatnmsThreshold;//Non-maximumsuppressionthreshold stringmodelpath; }; classYOLOV7 { public: YOLOV7(Net_configconfig); voiddetect(Mat&frame); private: intinpWidth; intinpHeight; vector class_names; intnum_class; floatconfThreshold; floatnmsThreshold; Netnet; voiddrawPred(floatconf,intleft,inttop,intright,intbottom,Mat&frame,intclassid); }; YOLOV7::YOLOV7(Net_configconfig) { this->confThreshold=config.confThreshold; this->nmsThreshold=config.nmsThreshold; this->net=readNet(config.modelpath); ifstreamifs("coco.names"); stringline; while(getline(ifs,line))this->class_names.push_back(line); this->num_class=class_names.size(); size_tpos=config.modelpath.find("_"); intlen=config.modelpath.length()-6-pos; stringhxw=config.modelpath.substr(pos+1,len); pos=hxw.find("x"); stringh=hxw.substr(0,pos); len=hxw.length()-pos; stringw=hxw.substr(pos+1,len); this->inpHeight=stoi(h); this->inpWidth=stoi(w); } voidYOLOV7::drawPred(floatconf,intleft,inttop,intright,intbottom,Mat&frame,intclassid)//Drawthepredictedboundingbox { //Drawarectangledisplayingtheboundingbox rectangle(frame,Point(left,top),Point(right,bottom),Scalar(0,0,255),2); //Getthelabelfortheclassnameanditsconfidence stringlabel=format("%.2f",conf); label=this->class_names[classid]+":"+label; //Displaythelabelatthetopoftheboundingbox intbaseLine; SizelabelSize=getTextSize(label,FONT_HERSHEY_SIMPLEX,0.5,1,&baseLine); top=max(top,labelSize.height); //rectangle(frame,Point(left,top-int(1.5*labelSize.height)),Point(left+int(1.5*labelSize.width),top+baseLine),Scalar(0,255,0),FILLED); putText(frame,label,Point(left,top),FONT_HERSHEY_SIMPLEX,0.75,Scalar(0,255,0),1); } voidYOLOV7::detect(Mat&frame) { Matblob=blobFromImage(frame,1/255.0,Size(this->inpWidth,this->inpHeight),Scalar(0,0,0),true,false); this->net.setInput(blob); vector outs; this->net.forward(outs,this->net.getUnconnectedOutLayersNames()); intnum_proposal=outs[0].size[0]; intnout=outs[0].size[1]; if(outs[0].dims>2) { num_proposal=outs[0].size[1]; nout=outs[0].size[2]; outs[0]=outs[0].reshape(0,num_proposal); } /////generateproposals vector confidences; vector boxes; vector classIds; floatratioh=(float)frame.rows/this->inpHeight,ratiow=(float)frame.cols/this->inpWidth; intn=0,row_ind=0;///cx,cy,w,h,box_score,class_score float*pdata=(float*)outs[0].data; for(n=0;n< num_proposal; n++) ///ÌØÕ÷ͼ³ß¶È { float box_score = pdata[4]; if (box_score >this->confThreshold) { Matscores=outs[0].row(row_ind).colRange(5,nout); PointclassIdPoint; doublemax_class_socre; //Getthevalueandlocationofthemaximumscore minMaxLoc(scores,0,&max_class_socre,0,&classIdPoint); max_class_socre*=box_score; if(max_class_socre>this->confThreshold) { constintclass_idx=classIdPoint.x; floatcx=pdata[0]*ratiow;///cx floatcy=pdata[1]*ratioh;///cy floatw=pdata[2]*ratiow;///w floath=pdata[3]*ratioh;///h intleft=int(cx-0.5*w); inttop=int(cy-0.5*h); confidences.push_back((float)max_class_socre); boxes.push_back(Rect(left,top,(int)(w),(int)(h))); classIds.push_back(class_idx); } } row_ind++; pdata+=nout; } //Performnonmaximumsuppressiontoeliminateredundantoverlappingboxeswith //lowerconfidences vector indices; dnn::NMSBoxes(boxes,confidences,this->confThreshold,this->nmsThreshold,indices); for(size_ti=0;i< indices.size(); ++i) { int idx = indices[i]; Rect box = boxes[idx]; this->drawPred(confidences[idx],box.x,box.y, box.x+box.width,box.y+box.height,frame,classIds[idx]); } } intmain() { Net_configYOLOV7_nets={0.3,0.5,"models/yolov7_736x1280.onnx"};////choices=["models/yolov7_736x1280.onnx","models/yolov7-tiny_384x640.onnx","models/yolov7_480x640.onnx","models/yolov7_384x640.onnx","models/yolov7-tiny_256x480.onnx","models/yolov7-tiny_256x320.onnx","models/yolov7_256x320.onnx","models/yolov7-tiny_256x640.onnx","models/yolov7_256x640.onnx","models/yolov7-tiny_480x640.onnx","models/yolov7-tiny_736x1280.onnx","models/yolov7_256x480.onnx"] YOLOV7net(YOLOV7_nets); stringimgpath="images/dog.jpg"; Matsrcimg=imread(imgpath); net.detect(srcimg); staticconststringkWinName="DeeplearningobjectdetectioninOpenCV"; namedWindow(kWinName,WINDOW_NORMAL); imshow(kWinName,srcimg); waitKey(0); destroyAllWindows(); }
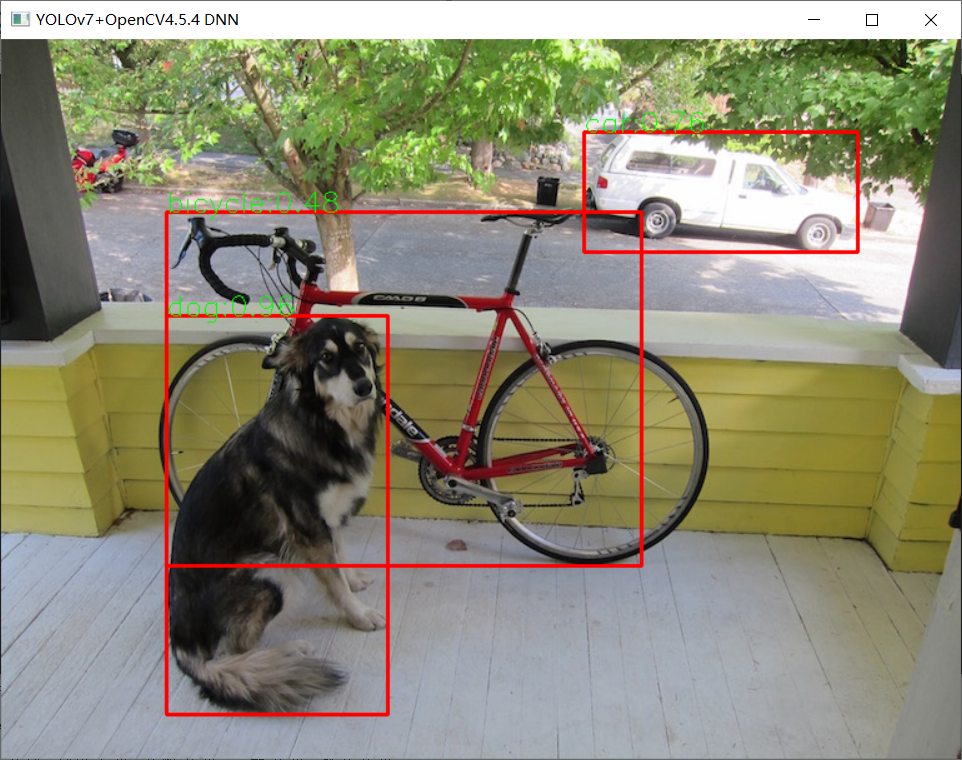
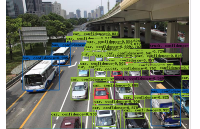
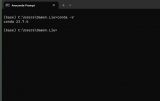
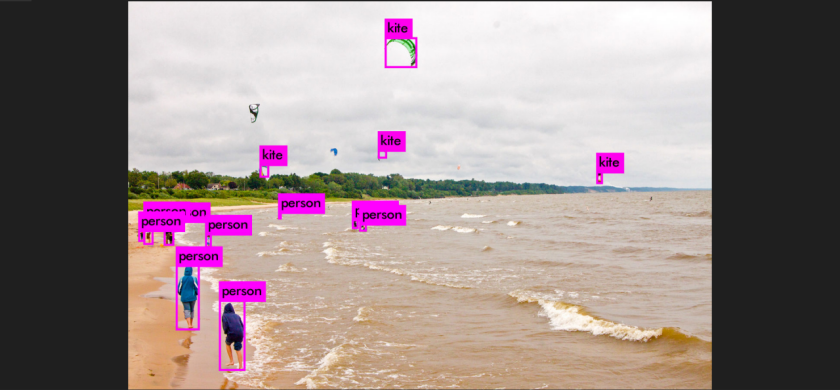
运行测试如下:

审核编辑:刘清
声明:本文内容及配图由入驻作者撰写或者入驻合作网站授权转载。文章观点仅代表作者本人,不代表电子发烧友网立场。文章及其配图仅供工程师学习之用,如有内容侵权或者其他违规问题,请联系本站处理。
举报投诉
-
OpenCV
+关注
关注
31文章
636浏览量
41785 -
python
+关注
关注
56文章
4813浏览量
85304
原文标题:源码 | OpenCV DNN + YOLOv7目标检测
文章出处:【微信号:CVSCHOOL,微信公众号:OpenCV学堂】欢迎添加关注!文章转载请注明出处。
发布评论请先 登录
相关推荐
在英特尔AI开发板上用OpenVINO NNCF优化YOLOv7
提高了性能和效率。YOLO算法作为one-stage目标检测算法最典型的代表,其基于深度神经网络进行对象的识别和定位,运行速度很快,可以用于实时系统。YOLOv7 是 YOLO 模型系列的下一个演进阶段,在不增加推理成本的情况下
yolov7 onnx模型在NPU上太慢了怎么解决?
yolov7tiny.onnx。输入大小为 224x224,但 npu 推理时间为 127 毫秒。好像太慢了。这个时间合理吗?以下是我的onnx模型转换步骤和我的onnxruntime执行代码: 1. 从 https
发表于 04-04 06:13
无法使用MYRIAD在OpenVINO trade中运行YOLOv7自定义模型怎么解决?
无法确定如何将 YOLOv7 模型的重量(.pt 文件)转换为OpenVINO™中间表示 (IR) 并推断有 MYRIAD 的 IR。
分辨率
转换使用此 GitHub* 存储库
发表于 08-15 08:29
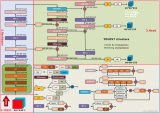
深度解析YOLOv7的网络结构
最近,Scaled-YOLOv4的作者(也是后来的YOLOR的作者)和YOLOv4的作者AB大佬再次联手推出了YOLOv7,目前来看,这一版的YOLOv7是一个比较正统的YOLO续作,
YOLOv6在LabVIEW中的推理部署(含源码)
YOLOv6 是美团视觉智能部研发的一款目标检测框架,致力于工业应用。如何使用python进行该模型的部署,官网已经介绍的很清楚了,但是对于如何在LabVIEW中实现该模型的
YOLOv7训练自己的数据集包括哪些
YOLOv7训练自己的数据集整个过程主要包括:环境安装—制作数据集—模型训练—模型测试—模型推理 一、准备深度学习环境 本人的笔记本电脑系统是:Windows10 首先下载YOLOv7的代码
三种主流模型部署框架YOLOv8推理演示
部署。这里以YOLOv8为例,演示了YOLOv8对象检测模型在OpenVINO、ONNXRUNTIME、TensorRT三个主流框架上C++
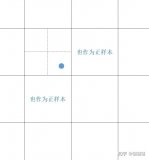
yolov5和YOLOX正负样本分配策略
整体上在正负样本分配中,yolov7的策略算是yolov5和YOLOX的结合。因此本文先从yolov5和YOLOX正负样本分配策略分析入手,后引入到YOLOv7的解析中。
发表于 08-14 11:45
•2433次阅读
使用OpenVINO优化并部署训练好的YOLOv7模型
在《英特尔锐炫 显卡+ oneAPI 和 OpenVINO 实现英特尔 视频 AI 计算盒训推一体-上篇》一文中,我们详细介绍基于英特尔 独立显卡搭建 YOLOv7 模型的训练环境,并完成了 YOLOv7 模型训练,获得了最佳精度的模型权重。
OpenCV4.8+YOLOv8对象检测C++推理演示
自从YOLOv5更新成7.0版本,YOLOv8推出以后,OpenCV4.6以前的版本都无法再加载导出ONNX格式模型了,只有OpenCV4.7以上版本才可以支持最新版本
详细解读YOLOV7网络架构设计
YOLOV7提出了辅助头的一个训练方法,主要目的是通过增加训练成本,提升精度,同时不影响推理的时间,因为辅助头只会出现在训练过程中。
发表于 11-27 10:45
•879次阅读

基于OpenCV DNN实现YOLOv8的模型部署与推理演示
基于OpenCV DNN实现YOLOv8推理的好处就是一套代码就可以部署在Windows10系统、乌班图系统、Jetson的Jetpack系统

在树莓派上部署YOLOv5进行动物目标检测的完整流程
卓越的性能。本文将详细介绍如何在性能更强的计算机上训练YOLOv5模型,并将训练好的模型部署到树莓派4B上,通过树莓派的摄像头进行实时动物目标检测。
一、在电脑上训练
采用华为云 Flexus 云服务器 X 实例部署 YOLOv3 算法完成目标检测
一、前言 1.1 开发需求 这篇文章讲解: 采用华为云最新推出的 Flexus 云服务器 X 实例部署 YOLOv3 算法,完成图像分析、目标检测。 随着计算机视觉技术的飞速发展,深度


 工商网监
工商网监
评论