该项目是一个无需任何互联网连接即可显示当地大气压力、温度湿度和紫外线指数的气象站。
背景
之前很长一段时间,我想在不使用互联网的情况下制作一个气象站,测量周围的天气数据并在需要时查看数据。所以,如今我着手做了一个看起来很酷的当地气象站,可以测量你周围的气压、温度、湿度和当天的紫外线指数(如果你把它放在窗户附近)。它还有一个时钟屏幕,用于显示时间、日期和星期几。
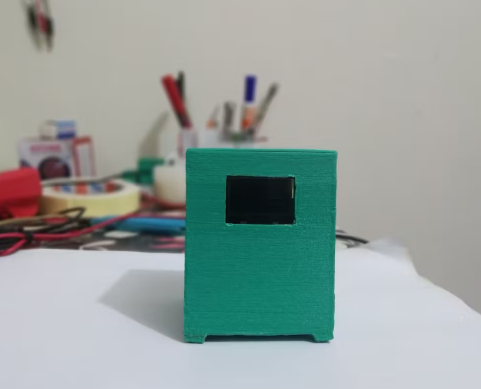
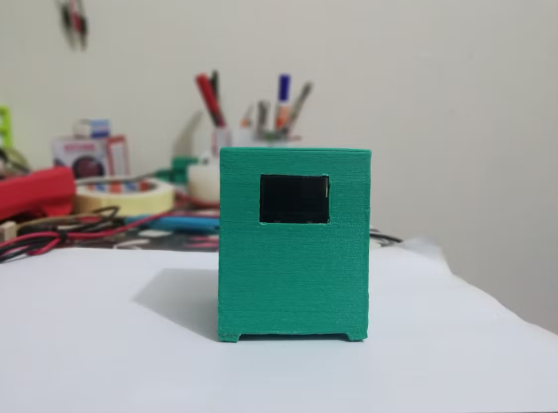
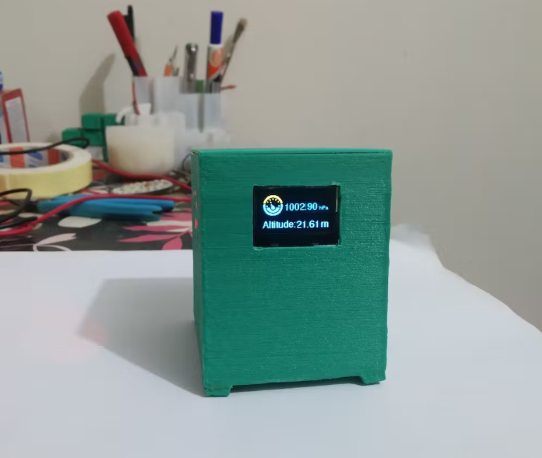
在本文中,我将向您展示如何通过这些步骤制作这个凉爽的气象站。
第 1 步:构建外壳
我使用Autodesk fusion 360创建外壳并用绿色 PLA 打印。它需要支撑,我在我的 Ender 3 上以 70mm/s 的速度以 20% 的填充量打印它。
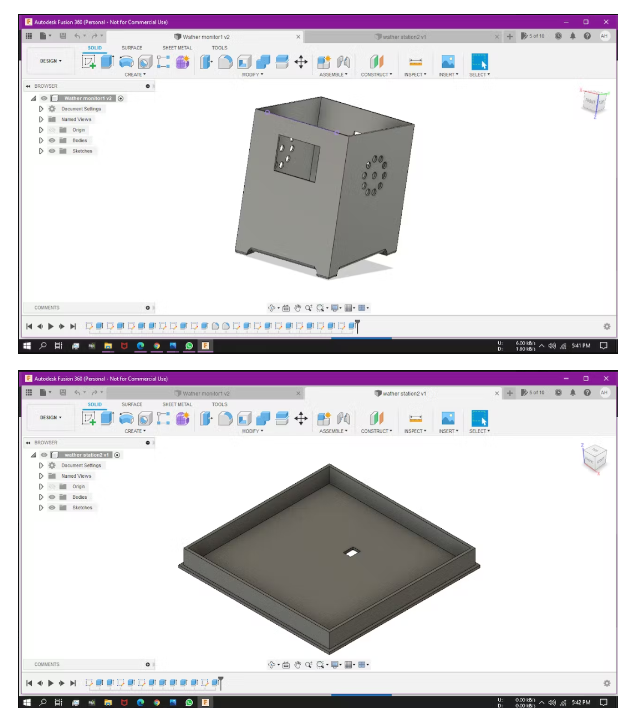
第 2 步:BMP280
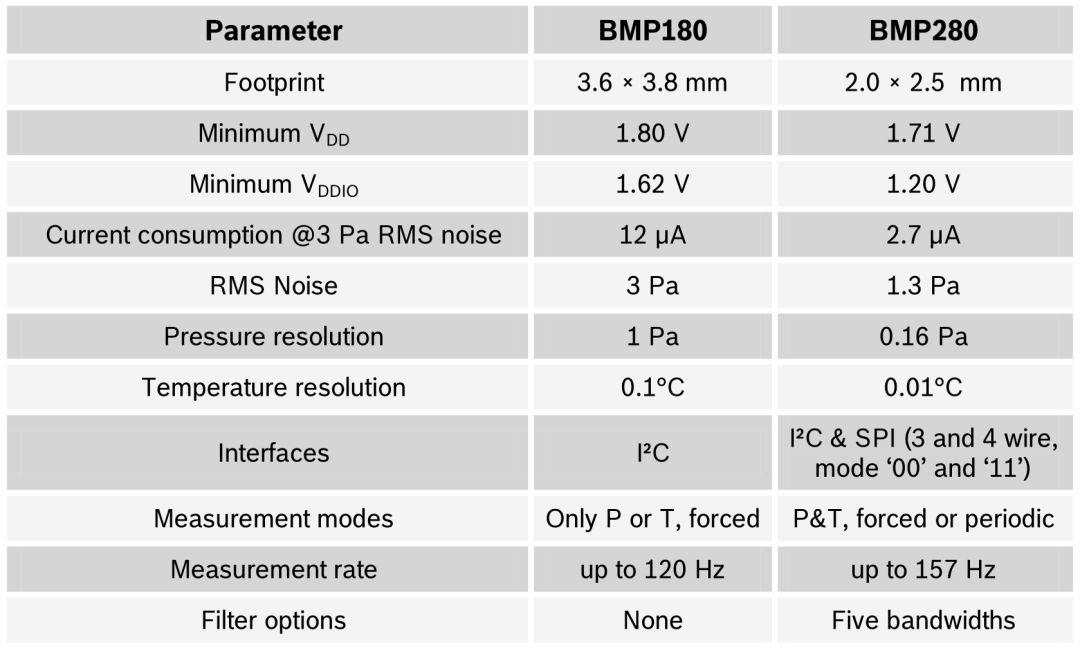
BMP280 是大气压力和温度传感器,它使用 I2C 或 SPI 协议与 Arduino 通信。这里我使用 SPI。要使用 SPI,请连接-
CS到D10
SDA 转 D11
SDO 到 D12
SCK 到 D13
在代码部分,要使用这个传感器,我们需要一个库。首先,我将库包含在代码中#include 《Adafruit_BMP280.h》。你可以在本文下方找到跳转。
然后我定义传感器的 SPI 引脚。在 setup 函数中,我初始化 BMP 传感器,在 loop 函数中,我使用bmp.readPressure()andbmp.readTemperature()命令读取压力和温度数据。我将压力值除以 100 以测量以 hPa 为单位的压力。要测量我使用bmp.readAltitude(1005.47)命令的高度。在这一步,您必须根据您所在地区的平均压力更改值。(1005.47)
第 3 步:DS3231 RTC
这个气象站还有一个时间屏幕,可以显示当前时间、日期和星期的日子。为此,我使用了 DS231 RTC 模块,它使用 I2C 协议进行通信。所以要使用这个,连接 -
SCL 到 A5
SDA 转 A4
首先,您必须使用库示例中的DS3231_set.ino程序在 RTC 上设置时间和日期。
在主程序中,我包含库#include 《DS3231.h》并根据库中的指令读取时间数据。这里我使用库中的示例作为代码的参考。我为一周中的每一天创建了一个案例来查找当前日期。
第 4 步:DHT11
我用这个传感器来测量湿度。为此,我将其数据连接到 Arduino D2 。在程序中,我包含 DHT 库,#include 《DHT.h》然后在设置中初始化传感器,在循环中,我使用dht.readHumidity()命令读取湿度值。
第 5 步:GUVA-S12SD 紫外线传感器
GUVA-S12SD是基于氮化镓的肖特基型光电二极管。它具有240-370nm的典型UV检测波长(覆盖UVB和大部分UVA光谱)。它输出一个校准的模拟电压,该电压随紫外光强度而变化。因此,我们可以通过 Arduino ADC 读取模拟值。
在循环功能中,我模拟读取传感器值并计算紫外线指数
float sensorValue = analogRead(A0);
float sensorVoltage = sensorValue / 1024 * 5.0;
int UV_index = sensorVoltage / 0.1;
第 6 步:OLED 显示屏
我在这个项目中使用 0.96“ 128*64 OLED 显示器,它使用 I2C 协议,所以我将它连接到 Arduino,如下所示 -
SCK 到 A5
SDA 转 A4
在程序中,我首先涵盖了Adafruit_SSD1306和Adafruit_GFX库
#include 《Adafruit_GFX.h》
#include 《Adafruit_SSD1306.h》
然后我创建显示变量并添加一些位图来显示一些图像。在设置中,我初始化了显示。然后在循环中,我使用该display.print()函数显示每个数据。我在四个页面上显示数据,时间、压力、温度和湿度以及 UV_index。每页之间有 5 秒的延迟。
Local weather station code:
#include
#include
然后我创建显示变量并添加一些位图来显示一些图像。在设置中,我初始化了显示。然后在循环中,我使用该display.print()函数显示每个数据。我在四个页面上显示数据,时间、压力、温度和湿度以及 UV_index。每页之间有 5 秒的延迟。
Local weather station code:
#include
#include
#include
#include
#include
#include
#include
#include
#include
//#include
#define SCREEN_WIDTH 128
#define SCREEN_HEIGHT 64
#define OLED_RESET 4
Adafruit_SSD1306 display(SCREEN_WIDTH, SCREEN_HEIGHT, &Wire, OLED_RESET);
#define BMP_SCK (13)
#define BMP_MISO (12)
#define BMP_MOSI (11)
#define BMP_CS (10)
DS3231 clock;
bool century = false;
bool h12Flag;
bool pmFlag;
Adafruit_BMP280 bmp(BMP_CS, BMP_MOSI, BMP_MISO, BMP_SCK);
#define DHTPIN 2
#define DHTTYPE DHT11
DHT dht(DHTPIN, DHTTYPE);
const unsigned char PROGMEM frame0 [] = {0x00, 0x00, 0x00, 0x00, 0x00, 0x00, 0x00, 0x00, 0x00, 0x00, 0x00, 0x01, 0xFF, 0x80, 0x00, 0x00, 0x0F, 0xFF, 0xF0, 0x00, 0x00, 0x3F, 0xFF, 0xFC, 0x00, 0x00, 0x7F, 0x81, 0xFE, 0x00, 0x00, 0xFC, 0x00, 0x3F, 0x00, 0x01, 0xF0, 0x00, 0x0F, 0x80, 0x03, 0xE0, 0x18, 0x07, 0xC0, 0x07, 0x86, 0x18, 0x61, 0xE0, 0x0F, 0x02, 0x00, 0x40, 0xF0, 0x0F, 0x02, 0x00, 0x40, 0xF0, 0x1E, 0x00, 0x00, 0x00, 0x78, 0x1C, 0x40, 0x00, 0x02, 0x38, 0x3C, 0x61, 0x00, 0x06, 0x3C, 0x3C, 0x01, 0x80, 0x00, 0x3C, 0x38, 0x00, 0x80, 0x00, 0x1C, 0x38, 0x00, 0xC0, 0x00, 0x1C, 0x78, 0x00, 0xE0, 0x00, 0x1E, 0x79, 0xC0, 0xF0, 0x03, 0x9E, 0x79, 0xC0, 0x7C, 0x03, 0x9E, 0x78, 0x00, 0x7E, 0x00, 0x1E, 0x38, 0x00, 0x7E, 0x00, 0x1C, 0x38, 0xFC, 0xFF, 0x3F, 0x1C, 0x3C, 0xFC, 0x7E, 0x3F, 0x3C, 0x3C, 0xFE, 0x7E, 0x7F, 0x3C, 0x1C, 0x7E, 0x18, 0x7E, 0x38, 0x1E, 0x3F, 0x00, 0xFC, 0x78, 0x0F, 0x3F, 0xC3, 0xFC, 0xF0, 0x0F, 0x0F, 0xFF, 0xF8, 0xF0, 0x07, 0x87, 0xFF, 0xE1, 0xE0, 0x03, 0xC1, 0xFF, 0x83, 0xC0, 0x03, 0xF0, 0x3C, 0x0F, 0xC0, 0x01, 0xFC, 0x00, 0x3F, 0x80, 0x00, 0x7F, 0x81, 0xFE, 0x00, 0x00, 0x3F, 0xFF, 0xFC, 0x00, 0x00, 0x0F, 0xFF, 0xF0, 0x00, 0x00, 0x01, 0xFF, 0x80, 0x00, 0x00, 0x00, 0x00, 0x00, 0x00, 0x00, 0x00, 0x00, 0x00, 0x00, 0x00, 0x00, 0x00, 0x00, 0x00};
const unsigned char PROGMEM frame1 [] = {0x00, 0x00, 0x00, 0x00, 0x00, 0x00, 0x00, 0x18, 0x00, 0x00, 0x00, 0x00, 0x7E, 0x00, 0x00, 0x00, 0x00, 0xC3, 0x00, 0x00, 0x01, 0x00, 0x9D, 0x80, 0x00, 0x03, 0x80, 0xB4, 0xE0, 0x00, 0x06, 0x80, 0xA6, 0x80, 0x00, 0x04, 0xC0, 0xA6, 0xE0, 0x00, 0x0C, 0x40, 0xA6, 0xE0, 0x00, 0x08, 0x60, 0xA6, 0x80, 0x00, 0x08, 0x20, 0xA6, 0xE0, 0x00, 0x08, 0x60, 0xA6, 0x80, 0x00, 0x0E, 0xC0, 0xA6, 0xE0, 0x00, 0x03, 0x80, 0xA6, 0x80, 0x00, 0x00, 0x10, 0xA6, 0xC0, 0x00, 0x00, 0x38, 0xA6, 0xE0, 0x00, 0x00, 0x38, 0xA6, 0x80, 0x00, 0x00, 0x6C, 0xA6, 0xE0, 0x00, 0x00, 0x44, 0xA6, 0x80, 0x00, 0x00, 0x6C, 0xA6, 0xE0, 0x00, 0x00, 0x38, 0xA6, 0x80, 0x00, 0x00, 0x00, 0xA6, 0x80, 0x00, 0x00, 0x00, 0xA4, 0xE0, 0x00, 0x00, 0x00, 0xA6, 0x80, 0x00, 0x00, 0x40, 0xA6, 0xE0, 0x00, 0x00, 0xC0, 0xA6, 0x80, 0x00, 0x01, 0xA0, 0xA6, 0xE0, 0x00, 0x01, 0x30, 0xA6, 0xE0, 0x00, 0x03, 0x10, 0xA6, 0x80, 0x00, 0x02, 0x18, 0xA6, 0xE0, 0x00, 0x06, 0x08, 0xA6, 0x80, 0x00, 0x06, 0x08, 0xA6, 0x80, 0x00, 0x02, 0x19, 0xA6, 0xC0, 0x00, 0x03, 0xF3, 0x26, 0x60, 0x00, 0x00, 0xC6, 0x26, 0x30, 0x00, 0x00, 0x0C, 0xE3, 0x10, 0x00, 0x00, 0x09, 0x80, 0x98, 0x00, 0x00, 0x19, 0x00, 0xC8, 0x00, 0x00, 0x13, 0x00, 0x6C, 0x00, 0x00, 0x12, 0x00, 0x6C, 0x00, 0x00, 0x12, 0x00, 0x6C, 0x00, 0x00, 0x12, 0x00, 0x6C, 0x00, 0x00, 0x1B, 0x00, 0x4C, 0x00, 0x00, 0x09, 0x80, 0xC8, 0x00, 0x00, 0x0C, 0xC1, 0x98, 0x00, 0x00, 0x04, 0x7F, 0x30, 0x00, 0x00, 0x06, 0x1C, 0x60, 0x00, 0x00, 0x03, 0x81, 0xC0, 0x00, 0x00, 0x00, 0xFF, 0x80, 0x00, 0x00, 0x00, 0x00, 0x00, 0x00, 0x00, 0x00, 0x00, 0x00, 0x00};
const unsigned char PROGMEM frame2 [] = {0xFF, 0xFF, 0xFF, 0xFF, 0xFF, 0xFF, 0xFF, 0xFF, 0xFF, 0xFF, 0xFF, 0xFF, 0xFF, 0xFF, 0xFF, 0xFF, 0xFF, 0xFF, 0xFF, 0xFF, 0xFF, 0xFF, 0xFF, 0xFF, 0xFF, 0xFF, 0xFF, 0xFF, 0xFF, 0xFF, 0xFF, 0xFF, 0xFF, 0xFF, 0xFF, 0xFF, 0xFF, 0xFF, 0xFF, 0xFF, 0xFF, 0xFF, 0xFF, 0xFF, 0xFF, 0xFF, 0xFF, 0xFF, 0xFF, 0xFF, 0xFF, 0xFF, 0xFF, 0xFF, 0xFF, 0xFF, 0xFF, 0xFF, 0xFF, 0xFF, 0xFF, 0xFF, 0xFF, 0xFF, 0xFF, 0xFF, 0xFF, 0xFF, 0xFF, 0xFF, 0xFF, 0xFF, 0xFF, 0xFF, 0xFF, 0xFF, 0xFF, 0xFF, 0xFF, 0xFF, 0xFF, 0xFF, 0xFF, 0xFF, 0xFF, 0xFF, 0xFF, 0xFF, 0xFF, 0xFF, 0xFF, 0xFF, 0xFF, 0xFF, 0xFF, 0xFF, 0xFF, 0xFF, 0xFF, 0xFF, 0xFF, 0xFF, 0xFF, 0xFF, 0xFF, 0xFF, 0xFF, 0xFF, 0xFF, 0xFF, 0xFF, 0xFF, 0xFF, 0xFF, 0xFF, 0xFF, 0xFF, 0xFF, 0xFF, 0xFF, 0xFF, 0xFF, 0xFF, 0xFF, 0xFF, 0xFF, 0xFF, 0xFF, 0xFF, 0xFF, 0xFF, 0xFF, 0xFF, 0xFF, 0xFF, 0xFF, 0xFF, 0xFF, 0xFF, 0xFF, 0xFF, 0xFF, 0xFF, 0xFF, 0xFF, 0xFF, 0xFF, 0xFF, 0xFF, 0xFF, 0xFF, 0xFF, 0xFF, 0xFF, 0xFF, 0xFF, 0xFF, 0xFF, 0xFF, 0xFF, 0xFF, 0xFF, 0xFF, 0xFF, 0xFF, 0xFF, 0xFF, 0xFF, 0xFF, 0xFF, 0xFF, 0xFF, 0xFF, 0xFF, 0xFF, 0xFF, 0xFF, 0xFF, 0xFF, 0xFF, 0xFF, 0xFF, 0xFF, 0xFF, 0xFF, 0xFF, 0xFF, 0xFF, 0xFF, 0xFF, 0xFF, 0xFF, 0xFF, 0xFF, 0xFF, 0xFF, 0xFF, 0xFF, 0xFF, 0xFF, 0xFF, 0xFF, 0xFF, 0xFF, 0xFF, 0xFF, 0xFF, 0xFF, 0xFF, 0xFF, 0xFF, 0xFF, 0xFF, 0xFF, 0xFF, 0xFF, 0xFF, 0xFF, 0xFF, 0xFF, 0xFF, 0xFF, 0xFF, 0xFF, 0xFF, 0xFF, 0xFF, 0xFF, 0xFF, 0xFF, 0xFF, 0xFF, 0xFF, 0xFF, 0xFF, 0xFF, 0xFF, 0xFF, 0xFF, 0xFF, 0xFF, 0xFF, 0xFF, 0xFF, 0xFF, 0xFF, 0xFF, 0xFF, 0xFF, 0xFF, 0xFF, 0xFF, 0xFF, 0x80};
void setup() {
Serial.begin(57600);
if (!display.begin(SSD1306_SWITCHCAPVCC, 0x3C)) {
Serial.println(F("SSD1306 failed"));
}
Wire.begin();
dht.begin();
if (!bmp.begin()) {
Serial.println(F("Problem.bmp"));
while (1) delay(10);
}
display.clearDisplay();
display.setTextColor(WHITE);
display.setTextSize(1);
display.setCursor(0, 9);
display.setFont(&FreeSans9pt7b);
display.println("**** LOCAL ****");
display.setCursor(0, 38);
display.setFont(&FreeMonoBoldOblique12pt7b);
display.println("wather");
display.setCursor(27, 58);
display.println("Station");
display.display();
delay(2000);
bmp.setSampling(Adafruit_BMP280::MODE_NORMAL, /* Operating Mode. */
Adafruit_BMP280::SAMPLING_X2, /* Temp. oversampling */
Adafruit_BMP280::SAMPLING_X16, /* Pressure oversampling */
Adafruit_BMP280::FILTER_X16, /* Filtering. */
Adafruit_BMP280::STANDBY_MS_500); /* Standby time. */
}
void loop() {
//Time
display.clearDisplay();
display.setTextColor(WHITE);
display.setTextSize(1);
display.setCursor(13, 15);
display.setFont(&FreeMonoBoldOblique12pt7b);
display.print(clock.getHour(h12Flag, pmFlag));
display.setCursor(38, 15);
display.println(":");
display.setCursor(50, 15);
display.println(clock.getMinute());
display.setCursor(70, 15);
if (pmFlag) {
display.println(" PM");
} else {
display.println(" AM ");
}
display.setFont(&FreeSans9pt7b);
display.setCursor(20, 60);
display.println(clock.getDate());
display.setCursor(40, 60);
display.println("/");
display.setCursor(46, 60);
display.println(clock.getMonth(century));
display.setCursor(65, 60);
display.println("/");
display.setCursor(70, 60);
display.println("20");
display.setCursor(90, 60);
display.println(clock.getYear());
display.setCursor(30, 30);
display.setFont(&FreeSans9pt7b);
switch (clock.getDoW()) {
case 1:
display.println("Saturday");
break;
case 2:
display.println("Sunday");
break;
case 3:
display.println("Monday");
break;
case 4:
display.println("Tuesday");
break;
case 5:
display.println("Wednesday");
break;
case 6:
display.println("Thursday");
break;
case 7:
display.println("Friday");
break;
}
display.display();
delay(5000);
//P
display.clearDisplay();
display.drawBitmap(0, 0, frame0, 40, 40, 1);
display.setFont(&FreeSans9pt7b);
display.setCursor(41, 28);
display.println(bmp.readPressure() / 100);
display.setCursor(110, 28);
display.setFont();
display.println("hPa");
display.setCursor(0, 55);
display.setFont(&FreeSans9pt7b);
display.println("Altitude:");
display.setCursor(65, 62);
display.println(bmp.readAltitude(1005.47));
display.setCursor(113, 62);
display.println("m");
display.display();
delay(5000);
//T&RH
display.clearDisplay();
display.setFont(&FreeMonoBoldOblique12pt7b);
display.drawBitmap(0, 5, frame1, 40, 51, 1);
display.setCursor(35, 30);
display.print(bmp.readTemperature());
display.setFont(&FreeSans9pt7b);
display.setCursor(102, 28);
display.println(" *");
display.setCursor(110, 31);
display.println(" C");
display.setFont();
display.setCursor(66, 45);
display.println("RH :");
byte RH = dht.readHumidity();
display.setCursor(95, 45);
display.println(RH);
display.setCursor(110, 45);
display.println("%");
display.drawBitmap(0, 56, frame2, 135, 15, 1);
display.display();
delay(5000);
//UV
display.clearDisplay();
float sensorValue = analogRead(A0);
float sensorVoltage = sensorValue / 1024 * 5.0;
int UV_index = sensorVoltage / 0.1;
display.setFont(&FreeSans9pt7b);
display.setCursor(0, 15);
display.print(" UV INDEX ");
display.setCursor(58, 45);
display.println(UV_index);
display.display();
delay(5000);
}
-
气象站
+关注
关注
1文章
761浏览量
15768 -
DIY设计
+关注
关注
2文章
59浏览量
19895 -
BMP280
+关注
关注
1文章
20浏览量
5787
发布评论请先 登录
相关推荐


 利用BMP280制作一个气象站



评论