本文来源电子发烧友社区,作者:离北况归, 帖子地址:https://bbs.elecfans.com/jishu_2310076_1_1.html
从3.1release开始使用的开机动画(视频演示看作者原帖子文章)
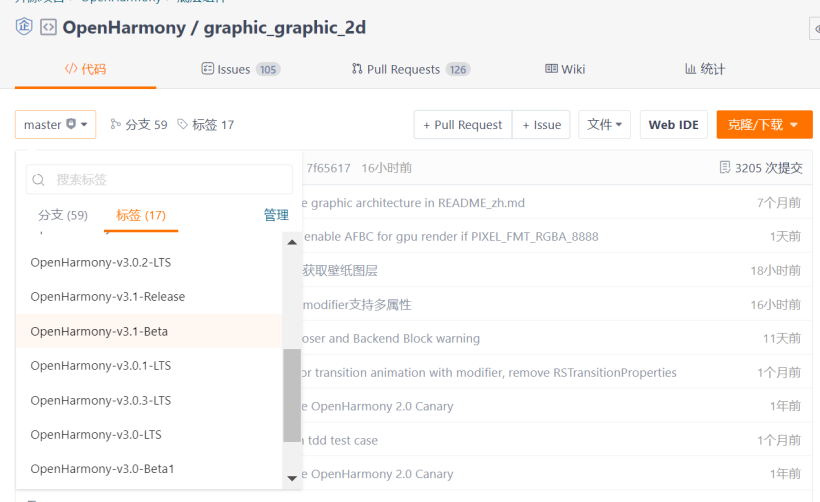
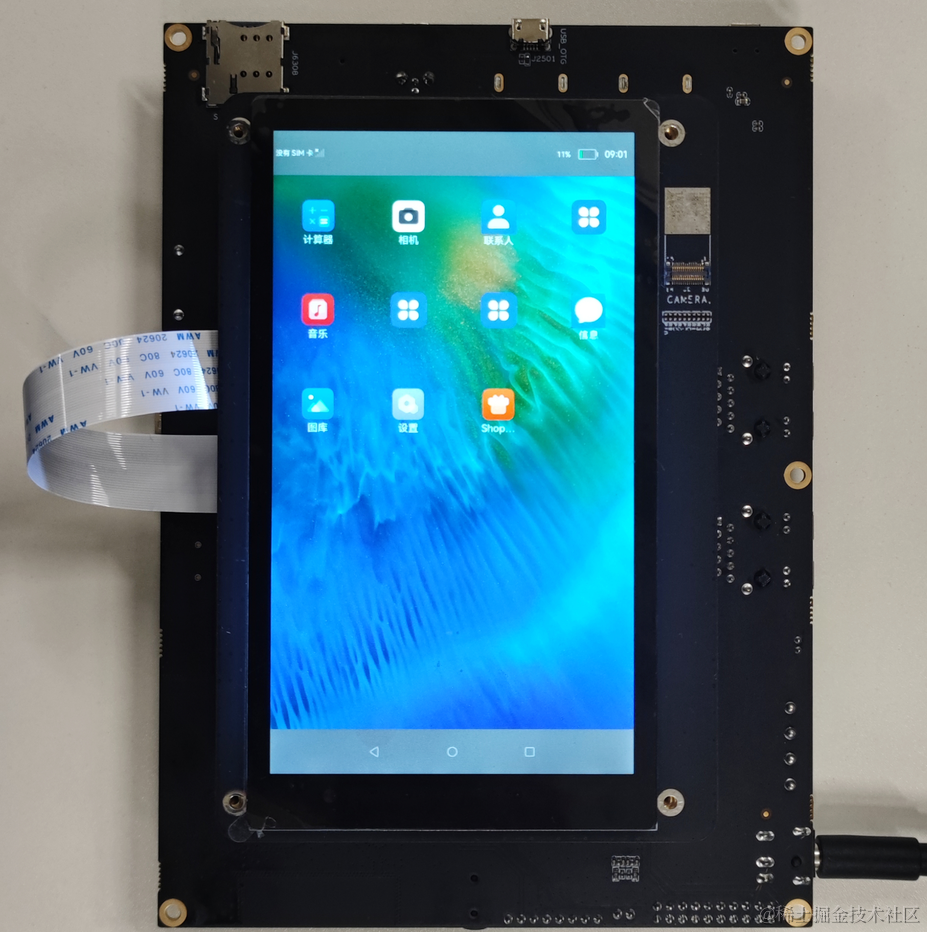
对于笔者这个openharmony高校开发者来说,开源的乐趣在于折腾。在此记录下折腾OpenHarmony标准系统开机动画的过程,ohos的开机动画从3.1beta之后经历过一次变更。下面展示一下变更前和变更后的开机动画。
OpenHarmony3.1beta版本使用的旧开机动画
- 这个开机动画和HarmonyOS的有异曲同工之妙。

从OpenHarmony3.1release版本开始使用的新开机动画
带有开机声效的视频如文章开头。
新版Logo设计者是刘石老师,刘石老师在《新发布的 OpenHarmony Logo 竟有这么多的故事!》一文中分享了新版logo背后的故事
两个版本开机动画实现方式不一样
3.2beta3开机动画模块源码分析
- graphic图形子系统包含了开机动画模块,开机动画模块在ohos3.2beta3源码下foundation/graphic/graphic_2d/frameworks/bootanimation,开机动画模块bootanimation源码结构
├── BUILD.gn
├── data
│   ├── bootanimation_tool
│   │   ├── README.md
│   │   ├── raw_maker.py
│   │   └── raw_player.py
│   ├── bootpic.zip   # 包括了开机动画的所有图片帧和json播放配置文件
│   ├── bootsound.wav # 开机声效
│   └── generate_raw.sh
├── include           # 开机动画模块的头文件
│   ├── boot_animation.h
│   ├── log.h
│   └── util.h
└── src               # 开机动画的源文件
    ├── boot_animation.cpp
    ├── main.cpp
    └── util.cpp
-
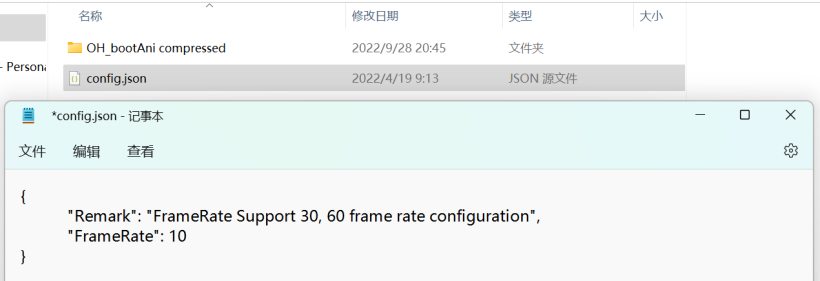
bootpic.zip打开后内容如下
-
OH_bootAni compressed内容如下,其中包括了150张开机动画的图片帧。
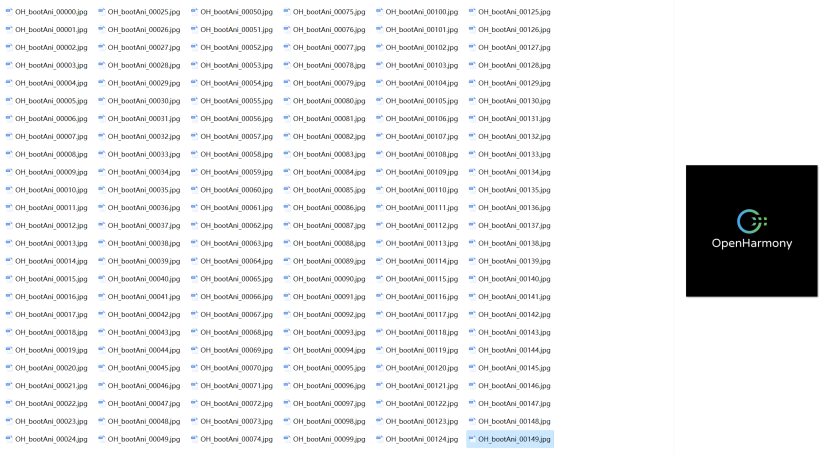
- config.json内容如下,在这个文件中设置开机动画的播放帧率,范围为30~60帧,此处视频帧率被设置为30帧。OH_bootAni compressed文件夹内有150张图片,所以开机动画的播放时间为5秒。
-
OH_bootAni compressed内容如下,其中包括了150张开机动画的图片帧。
{
	"Remark": "FrameRate Support 30, 60 frame rate configuration",
	"FrameRate": 30
}
开机动画源文件bootpic.zip和bootsound.wav等作为配置文件打包至开发板/system/etc/init目录下
阅读bootanimation目录下BUILD.gn可以知道bootpic.zip和bootsound.wav等作为配置文件打包至开放板/system/etc/init目录下。
## Install data/*.jpg to /system/etc/init/ {{{
ohos_prebuilt_etc("bootanimation_pics") {
  source = "data/bootpic.zip"     ## bootpic.zip在data目录下
  relative_install_dir = "init"
  part_name = "graphic_standard"  ## 部件名
  subsystem_name = "graphic"      ## 子系统名
}

ohos_prebuilt_etc("bootanimation_sounds") {
  source = "data/bootsound.wav"   ## bootsound.wav在data目录下
  relative_install_dir = "init"
  part_name = "graphic_standard"
  subsystem_name = "graphic"
}
## Install data/*.jpg to /system/etc/init/ }}}
bootpic.zip的解压缩依赖三方库zlib
阅读bootanimation目录下BUILD.gn可以知道bootpic.zip的解压缩依赖三方库zlib
config.json文件在util.h中被声明为C ++ 的std::string类型

-
阅读bootanimation目录下BUILD.gn可以知道config.json的解析依赖三方库cJSON

开机动画服务启动配置graphic.cfg分别启动了bootanimation进程
开机动画服务启动配置graphic.cfg在ohosbeta3源码./foundation/graphic/graphic_2d/graphic.cfg目录,分别启动了bootanimation和render_service进程。
.cfg只是一个为开发及使用方便而"发明"的一个后缀名。所以,这种文件没有固定的格式,其实也并不能算作是一种文件类型。

{
    "jobs" : [{
            "name" : "init",
            "cmds" : [
                "chmod 666 /dev/mali0",
                "chown system graphics /dev/mali0"
            ]
        }, {
            "name": "services:restartrender_service",
            "cmds": [
                "reset foundation",
                "reset bootanimation",
                "reset gralloc_host",
                "reset hwc_host"
            ]
        }
    ],
    "services" : [{
            "name" : "render_service",  # 渲染服务端
            "path" : ["/system/bin/render_service"],
            "critical" : [1, 5, 60],
            "importance" : -20,
            "uid" : "system",
            "gid" : ["system", "shell", "uhid", "root"],
            "caps" : ["SYS_NICE"],
            "secon" : "u:r:render_service:s0",
            "jobs" : {
                "on-restart" : "services:restartrender_service"
            },
            "once" : 0
        }, {
            "name" : "bootanimation",  # 开机启动进程
            "path" : ["/system/bin/bootanimation"],
            "bootevents": "bootevent.bootanimation.started",
            "importance" : -20,
            "once" : 1,
            "uid" : "graphics",
            "gid" : ["graphics", "system", "shell", "uhid", "root"],
            "secon" : "u:r:bootanimation:s0"
        }
    ]
}
-
可以用hdc_std工具将pc端与开发板连接进入shell界面运行
ps -ef命令,查看进程信息。
# ps -ef
UID            PID  PPID C STIME TTY          TIME CMD
····
system         565     1 19 09:12:27 ?    00:00:01 bootanimation
system         566     1 6 09:12:27 ?     00:00:00 render_service
····
-
查看beta3源码foundation/graphic/graphic_2d/BUILD.gn,可以知道graphic.cfg会被打包到开发板/system/etc/init/目录下
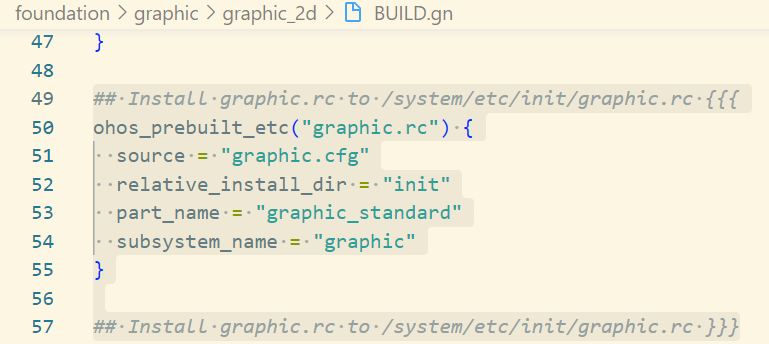
- 用hdc_std工具连接开发板后,服务启动配置graphic.cfg在开发板systemetcinit目录也能找到
find . -name graphic.cfg

boot_animation.cpp中将开发板目录/system/etc/init下的bootpic.zip和bootsound.wav声明为C ++ 的std::string类型
using namespace OHOS;
static const std::string BOOT_PIC_ZIP = "/system/etc/init/bootpic.zip";
static const std::string BOOT_SOUND_URI = "file://system/etc/init/bootsound.wav";
-
C ++中的std :: string类
- C ++在其定义中具有一种将字符序列表示为class对象的方式。此类称为std ::字符串。
- 它是一个容器类
-
static const既是只读的,又是只在当前模块中可见的。
- const 就是只读的意思,只在声明中使用;
- static 一般有2个作用,规定作用域和存储方式。
- 对于局部变量, static规定其为静态存储方式, 每次调用的初始值为上一次调用的值,调用结束后存储空间不释放
- 对于全局变量, 如果以文件划分作用域的话,此变量只在当前文件可见; 对于static函数也是在当前模块内函数可见。
-
using namespace OHOS;表示使用using指令使用OHOS空间,其在boot_animation.h中定义boot_animation.CPP中要用到boot_animation.h中OHOS空间中的函数和变量。
namespace OHOS {
class BootAnimation {
public:
    void Init(int32_t width, int32_t height, const std::shared_ptr& handler,
        std::shared_ptr& runner);
    void Draw();
    void CheckExitAnimation();
    void PlaySound();
    bool CheckFrameRateValid(int32_t ratevalue);
    ~BootAnimation();
private:
    void OnVsync();
    void OnDraw(SkCanvas* canvas, int32_t curNo);
    void InitBootWindow();
    void InitRsSurface();
    void InitPicCoordinates();
    int32_t windowWidth_;
    int32_t windowHeight_;
    sptr window_;
    sptr scene_;
    std::unique_ptr framePtr_;
    std::shared_ptr rsSurface_;
    OHOS::Rosen::RenderContext* rc_;
    int32_t freq_ = 30;
    int32_t realHeight_ = 0;
    int32_t realWidth_ = 0;
    int32_t pointX_ = 0;
    int32_t pointY_ = 0;
    int32_t picCurNo_ = -1;
    int32_t imgVecSize_ = 0;
    std::shared_ptr receiver_ = nullptr;
    std::shared_ptr soundPlayer_ = nullptr;
    ImageStructVec imageVector_;
    std::shared_ptr mainHandler_ = nullptr;
    std::shared_ptr runner_ = nullptr;
    bool setBootEvent_ = false;
};
} // namespace OHOS
3.1Beta开机动画模块源码分析
- 开机动画模块在社区gitee仓库OpenHarmony / graphic_graphic_2d
- bootanimation开机模块目录结构如下:
├─data
│    ├── bootanimation-480x960.raw
│    └── generate_raw.sh
├─include
│       ├── raw_parser.h
│       └── util.h
└─src
│    ├── raw_parser.cpp
│    ├── main.cpp
│    └── util.cpp
└─BUILD.gn
开机动画文件bootanimation.raw作为配置文件打包至开发板/system/etc目录下
## Install data/bootanimation-480x960.raw to /system/etc/bootanimation-480x960.raw {{{
ohos_prebuilt_etc("bootanimation-480x960.raw") {
  source = "data/bootanimation-480x960.raw"
  part_name = "graphic_standard"
  subsystem_name = "graphic"
}
## Install data/bootanimation-480x960.raw to /system/etc/bootanimation-480x960.raw }}}
RAW是未经处理、也未经压缩的格式,可以把RAW概念化为“原始图像编码数据”或更形象的称为“数字底片”。
3.2beta3开机动画制作
- 1.开机动画在3.2beta版本的源文件为bootpic.zip和bootpic.wav,需要利用视频剪辑软件制作好一段自己的开机动画。
- 2.然后利用特殊软件工具将制作好的视频变成150张图片,然后将图片编号再排好序。
- 3.最后打包为bootpic.zip压缩包。利用hdc_std工具将自制的bootpic.zip导入开发板/system/etc/init目录下。
- 4.重启开发板就可以了。
笔者使用的剪映软件(对笔者来说剪映够用)制作开机动画。然后在
https://www.img2go.com/zh/convert-to-image网址将视频转换成图片。

最后打包成bootpic.zip(需要和原生的bootpic.zip目录机构一样),hdc_std工具使用命令如下:
C:UsersjjhDesktop3.2beta1SDKohos-sdkwindowstoolchains-windows-3.2.2.5-Beta1toolchains>hdc_std shell
# cd system/etc/init # 进入system/etc/init目录
# mount -o remount,rw / # 将系统变成可读写
# ls
access_token.cfg                     locationsa.cfg
accessibility.cfg                    media_service.cfg
accountmgr.cfg                       memmgrservice.cfg
appspawn.cfg                         misc.cfg
audio_policy.cfg                     mmi_uinput.rc
batterystats.cfg                     msdp_musl.cfg
bgtaskmgr_service.cfg                multimodalinput.cfg
bluetooth_service.cfg                netmanager_base.cfg
bootpic.zip                          netsysnative.cfg
bootsound.wav                        nwebspawn.cfg
bytrace.cfg                          param_watcher.cfg
camera_service.cfg                   pasteboardservice.cfg
config.txt                           pinauth_sa_profile.cfg
console.cfg                          pulseaudio.cfg
dcamera.cfg                          resource_schedule_service.cfg
device_usage_statistics_service.cfg  samgr_standard_musl.cfg
deviceauth_service.cfg               screenlockservice.cfg
deviceinfoservice.cfg                sensors_musl.cfg
dhardware.cfg                        softbus_server_musl.cfg
distributed_data.cfg                 storage_daemon.cfg
distributedbms.cfg                   storage_manager.cfg
distributedfile.cfg                  telephony.cfg
distributedsched_musl.cfg            thermal.cfg
downloadservice.cfg                  thermal_protector.cfg
dscreen.cfg                          timeservice.cfg
dslm_service.cfg                     token_sync.cfg
edm.cfg                              udevd.rc
faceauth_sa_profile.cfg              ueventd.cfg
faultloggerd.cfg                     ui_service.cfg
fms_service.cfg                      updater_sa.cfg
foundation.cfg                       usb_service.cfg
graphic.cfg                          useriam.cfg
hidumper_service.cfg                 wallpaperservice.cfg
hilogd.cfg                           watchdog.cfg
hiview.cfg                           weston.cfg
huks_service.cfg                     wifi_hal_service.cfg
init.reboot.cfg                      wifi_standard.cfg
inputmethodservice.cfg               work_scheduler_service.cfg
installs.cfg
# rm bootpic.zip  # 删除原有的开机动画
# exit            # 退出开发板系统

C:UsersjjhDesktop3.2beta1SDKohos-sdkwindowstoolchains-windows-3.2.2.5-Beta1toolchains>hdc_std file send bootpic.zip /system/etc/init/
FileTransfer finish, File count = 1, Size:2776406 time:389ms rate:7137.29kB/s # 将自制的开机动画发送至/system/etc/init目录下
3.1beta版本开机动画制作
准备好一段开机动画的mp4格式动画,利用以下raw_maker.py脚本,内容如下:
# !/usr/bin/env python3
# -*- coding: utf-8 -*-
"""
* Copyright (c) 2022 Shenzhen Kaihong Digital Industry Development Co., Ltd.
* Licensed under the Apache License, Version 2.0 (the "License");
* you may not use this file except in compliance with the License.
* You may obtain a copy of the License at
*
* http://www.apache.org/licenses/LICENSE-2.0
*
* Unless required by applicable law or agreed to in writing, software
* distributed under the License is distributed on an "AS IS" BASIS,
* WITHOUT WARRANTIES OR CONDITIONS OF ANY KIND, either express or implied.
* See the License for the specific language governing permissions and
* limitations under the License.
"""

import struct
import zlib
import os
import argparse
import re
import pip


def lost_module(module_name):
    print("""
need %s module, try install first:

    pip install %s""" % (module_name, module_name))
    exit()


try:
    import cv2
except ImportError:
    pip.main(["install", "opencv-python", "-i", "https://pypi.tuna.tsinghua.edu.cn/simple"])
    try:
        import cv2
    except ImportError:
        cv2 = None
        lost_module("opencv-python")

try:
    from PIL import Image
except ImportError:
    pip.main(["install", "pillow"])
    try:
        from PIL import Image
    except ImportError:
        Image = None
        lost_module("pillow")

try:
    import numpy as np
except ImportError:
    pip.main(["install", "numpy"])
    try:
        import numpy as np
    except ImportError:
        np = None
        lost_module("numpy")


class RawMaker:
    """
    Make a boot video by a MP4 file or some .img files:
    """

    def __init__(self, args):
        self._mp4 = args.mp4
        self._image = args.image
        self._out = args.out
        self._display = [int(i) for i in re.split(r'[xX* ]+', args.display.strip())]
        self._rotate = args.rotate
        self._flip = args.flip
        self._fnp = 0
        self._vdo = None
        self._image_files = []

    def _iter_img(self):
        if self._mp4:
            success, frame = self._vdo.read()
            if success:
                image = Image.fromarray(frame)
                return success, image
            else:
                return False, None
        else:
            if self._fnp >= len(self._image_files):
                return False, None
            image = Image.open(os.path.join(self._image, self._image_files[self._fnp]))
            self._fnp += 1
            return True, image

    def make(self):
        frame_count, width, height = 0, 0, 0
        if self._mp4:
            if not os.path.exists(self._mp4):
                print("mp4 file %s is not exist" % self._mp4)
                exit()
            self._vdo = cv2.VideoCapture(self._mp4)
            fps = int(self._vdo.get(cv2.CAP_PROP_FPS))
            w = int(self._vdo.get(cv2.CAP_PROP_FRAME_WIDTH))
            h = int(self._vdo.get(cv2.CAP_PROP_FRAME_HEIGHT))
            frame_count = int(self._vdo.get(cv2.CAP_PROP_FRAME_COUNT))
            if fps != 30:
                print("video fps :", fps, ", width :", w, ", height :", h, ", frame count :", frame_count)
            if frame_count <= 0:
                exit()
        elif self._image:
            for fn in os.listdir(self._image):
                self._image_files.append(fn)
            frame_count = len(self._image_files)
            if frame_count <= 0:
                exit()
            self._image_files.sort()
        else:
            exit()

        output_bytes = bytearray(b"RAW.diff")
        offset = 8
        screen_old_bytes = None
        num = 0
        while True:
            ret, img = self._iter_img()
            if not ret:
                break
            num += 1
            img = img.convert("RGBA")
            if self._flip:
                img = img.transpose(Image.FLIP_LEFT_RIGHT)
            if self._rotate == 90:
                img = img.transpose(Image.ROTATE_90)
            elif self._rotate == 180:
                img = img.transpose(Image.ROTATE_180)
            elif self._rotate == 270:
                img = img.transpose(Image.ROTATE_270)
            if self._display[0] != 0:
                img = img.resize((self._display[0], self._display[1]))
            img = np.array(img)
            height, width = img.shape[0], img.shape[1]
            img[img < 20] = 0
            img = img.reshape(-1)
            screen_now_bytes = img.tobytes()
            if screen_old_bytes is None:
                screen_old_bytes = screen_now_bytes
                start_pos = 0
                end_pos = width * height * 4
            else:
                start_pos, end_pos = 3, 6
                for i in range(width * height * 4):
                    if screen_now_bytes[i] != screen_old_bytes[i]:
                        start_pos = i
                        break
                for i in range(width * height * 4 - 1, start_pos, -1):
                    if screen_now_bytes[i] != screen_old_bytes[i]:
                        end_pos = i + 1
                        break
                screen_old_bytes = screen_now_bytes
            print("r|%s%s|" % ("=" * int(num / frame_count * 30), " " * (30 - int(num / frame_count * 30))),
			        "%.2f%%" % (num / frame_count * 100), end="", flush=True)
            if start_pos == 3 or end_pos == 6:
                output_bytes[offset:offset + 16] = struct.pack("IIII", 0, 0, 0, 0)
                offset += 16
                continue
            compressed_bytes = zlib.compress(screen_old_bytes[start_pos:end_pos])
            raw_len = end_pos - start_pos
            new_len = len(compressed_bytes)
            output_bytes[offset:offset + 16] = struct.pack("IIII", 2, start_pos, raw_len, new_len)
            offset += 16
            output_bytes[offset:offset + new_len] = compressed_bytes
            offset += new_len
            while new_len % 4 != 0:
                new_len += 1
                output_bytes[offset:offset + 1] = b''
                offset += 1

        if not os.path.exists(self._out):
            os.makedirs(self._out)
        with open(os.path.join(self._out, "bootanimation-%dx%d.raw" % (width, height)), "wb") as fp:
            fp.write(output_bytes)
        print("nGenerate successfully!")


def parse_option():
    parser = argparse.ArgumentParser(description="Make a boot video by a MP4 file or some .img files",
                                     usage="python raw_maker.py (-m <*.mp4> | -i ) [-o ] "
                                           "[-d ] [-r ] [-f]n"
                                           "  eg.: python raw_maker.py -i ./source/png -o ./out -d 640x480n"
                                           "       python raw_maker.py -m ./animation.mp4 -o ./out -d 640x480")
    exclusive_group = parser.add_mutually_exclusive_group(required=True)
    exclusive_group.add_argument("-m", "--mp4", metavar="<*.mp4>", help="The input <*.mp4> file")
    exclusive_group.add_argument("-i", "--image", metavar="",
                                 help="The  where image files are stored")
    parser.add_argument("-o", "--out", metavar="", default=".",
                        help="Place generated .raw files into the ")
    parser.add_argument("-d", "--display", metavar="", default="0x0",
                        help="Set the boot video display  and zoom the image, e.g.:640x480")
    parser.add_argument("-r", "--rotate", metavar="", type=int, help="Rotate video , e.g.:90 180 270")
    parser.add_argument("-f", "--flip", action="store_true", help="Flip the video", )
    return parser.parse_args()


if __name__ == "__main__":
    raw_maker = RawMaker(parse_option())
    raw_maker.make()
在当前文件夹打开cmd窗口执行以下命令
python raw_maker.py -m ./cat.mp4 -d 720x1280

此时会生成cat.raw文件,分辨率为720x1280
播放cat.raw准备好raw_player.py脚本,内容如下:
#!/usr/bin/env python
# -*- coding: utf-8 -*-
"""
* Copyright (c) 2022 Shenzhen Kaihong Digital Industry Development Co., Ltd.
* Licensed under the Apache License, Version 2.0 (the "License");
* you may not use this file except in compliance with the License.
* You may obtain a copy of the License at
*
* http://www.apache.org/licenses/LICENSE-2.0
*
* Unless required by applicable law or agreed to in writing, software
* distributed under the License is distributed on an "AS IS" BASIS,
* WITHOUT WARRANTIES OR CONDITIONS OF ANY KIND, either express or implied.
* See the License for the specific language governing permissions and
* limitations under the License.
"""

import zlib
import struct
import time
import numpy as np
import cv2
import sys
import re
import argparse


class RawPlayer:
    """
        Play a boot video file
    """

    def __init__(self, args):
        self._raw = args.raw
        cv2.namedWindow("play", cv2.WINDOW_AUTOSIZE)
        pass

    def play(self):
        screen_size = re.findall("bootanimation-([0-9]+)x([0-9]+).raw", self._raw)
        if len(screen_size) != 1:
            exit()
        width, height = int(screen_size[0][0]), int(screen_size[0][1])
        with open(sys.argv[-1], "rb") as fp:
            data = fp.read()
        off = 8
        img = None
        while off < len(data):
            data_type, offset, length, data_length = struct.unpack("IIII", data[off:off + 16])
            off += 16
            if data_type == 0:
                time.sleep(0.03)
                continue

            out = zlib.decompress(data[off:off + data_length])

            if img is None:
                img = np.copy(np.frombuffer(out, dtype=np.uint8))
            else:
                temp_img = np.frombuffer(out, dtype=np.uint8)
                img[offset:offset + length] = temp_img
            reshape_img = img.reshape((height, width, 4))
            cv2.imshow("play", reshape_img)
            if cv2.waitKey(30) & 0xff == 27 or cv2.getWindowProperty("play", cv2.WND_PROP_VISIBLE) < 1:
                break
            while data_length % 4 != 0:
                data_length += 1
            off += data_length


def parse_option():
    parser = argparse.ArgumentParser(description="Play a boot video file",
                                     usage="python raw_player.py [-h] <*.raw>n"
                                           "  eg.: python raw_player.py ./bootanimation-640x480.raw")
    parser.add_argument("raw", metavar="<*.raw>", help="file <*.raw> to play")
    return parser.parse_args()


if __name__ == "__main__":
    raw_player = RawPlayer(parse_option())
    raw_player.play()
在当前文件夹打开cmd窗口,执行以下命令;
python raw_player.py bootanimation-720x1280.raw
效果如下: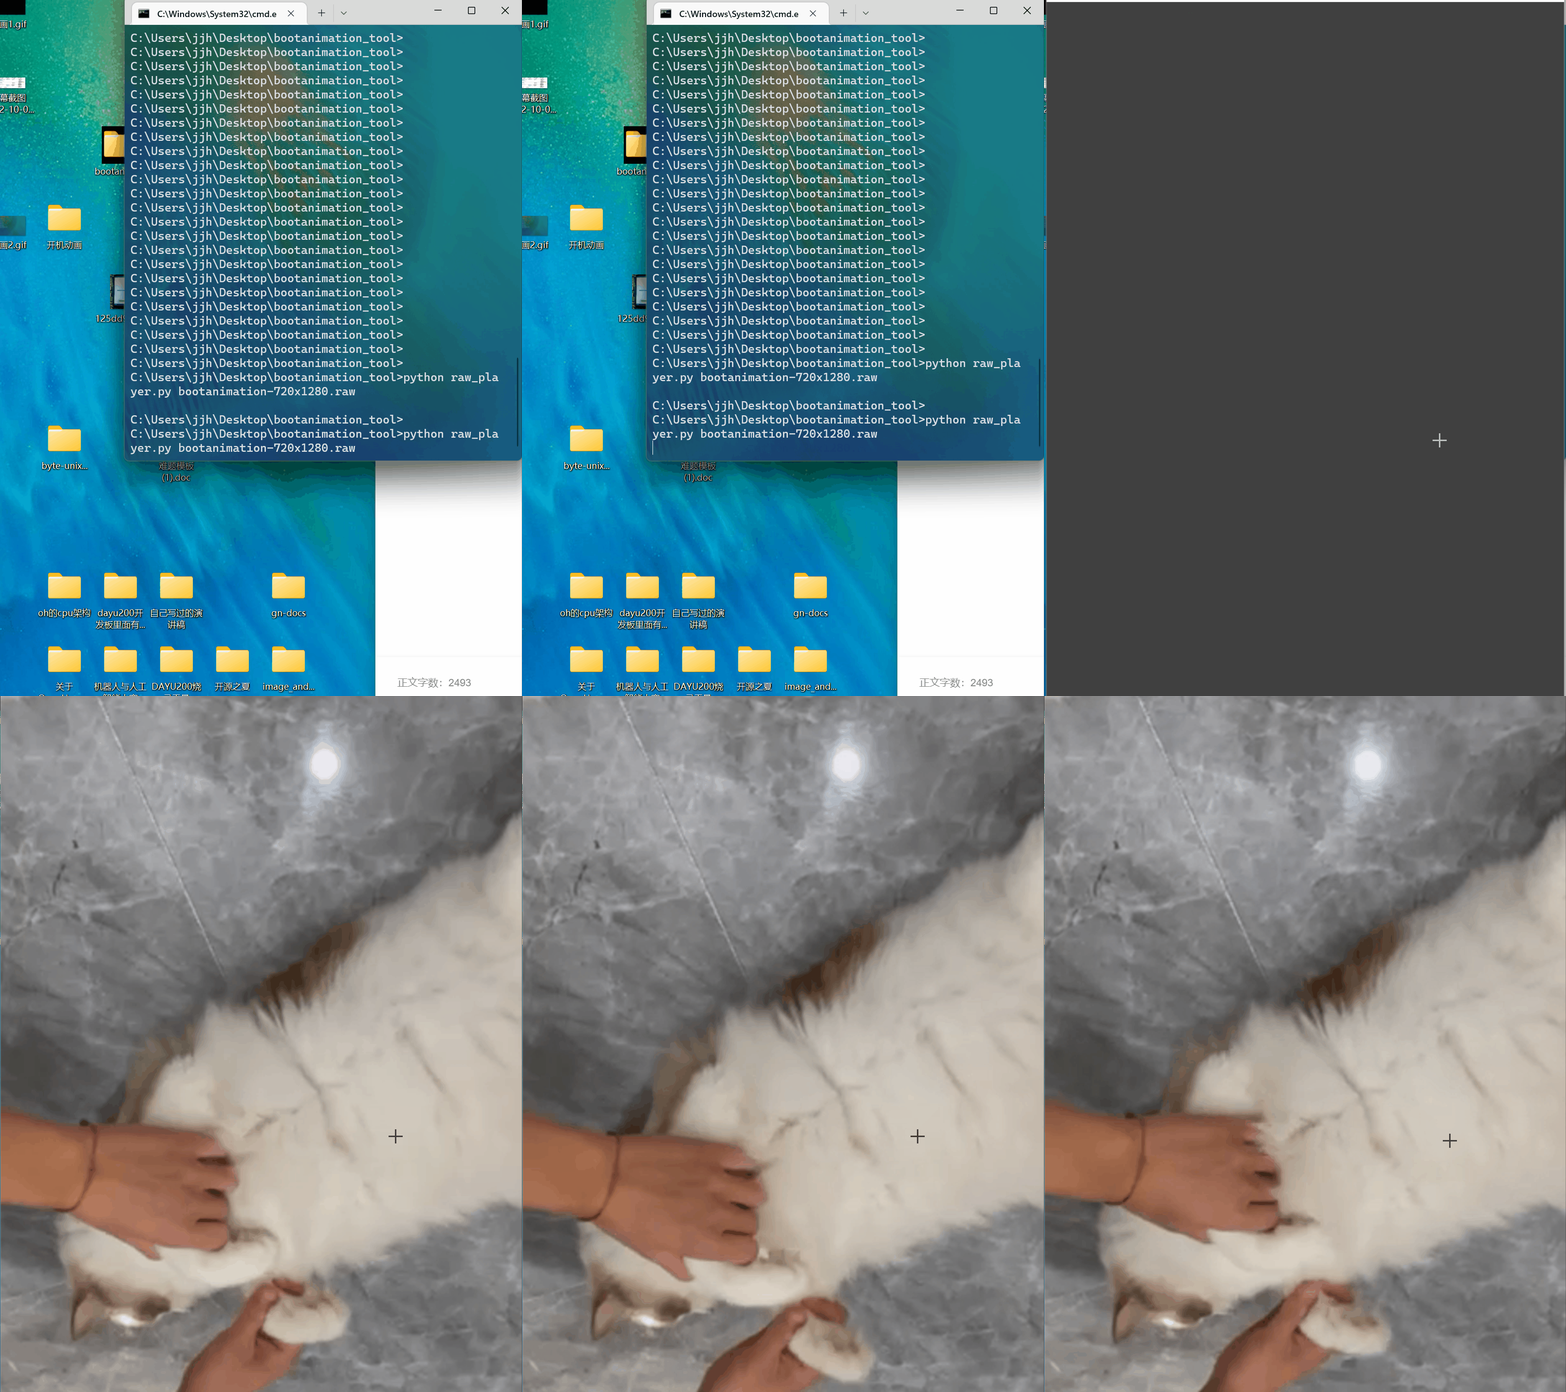
-
dayu200
+关注
关注
1文章
26浏览量
1193 -
润和软件
+关注
关注
1文章
265浏览量
867
发布评论请先 登录
相关推荐
瑞芯微RK3566鸿蒙开发板OpenHarmony标准系统应用兼容性测试指导

请求推荐无需NPU的OpenHarmony标准系统ARM开发板
润开鸿“龙芯+OpenHarmony”开发平台DAYU431先锋派新品发布

OpenHarmony之开机优化
鸿蒙OpenHarmony【基于Hi3516DV300开发板(时钟应用开发)】
鸿蒙OpenHarmony南向:【Hi3516标准系统入门(命令行方式)】

鸿蒙OpenHarmony【标准系统编写“Hello World”程序】 (基于RK3568开发板)
OpenHarmony开发实例:【电话簿联系人Contacts】

OpenHarmony开发实例:【 待办事项TodoList】
【鸿蒙】OpenHarmony运行docker详细步骤
请问DAYU200有SPI可以用么
开源大师兄开发板通过 OpenHarmony 3.2 Release版本兼容性测评


 【润和软件DAYU200开发板体验】自制OpenHarmony标准系统开机动画


评论