 RA2L1定时器中断

介绍
定时器中断是由单片机中的定时器溢出而申请的中断。利用定时器中断,控制LED灯的闪烁。
准备
J-Link烧写器一套,(USB转安卓)数据线,USB转串口工具,跳线若干;
瑞萨e2 studio(如果没有J-Link套件,在瑞萨官网下载支持串口烧录的软件Renesas Flash Programmer);
串口调试工具(自行准备)。
软件下载安装
在瑞萨官网直接搜索e2 studio,下滑在下载页面中找到如下安装压缩包,点击下载安装。

在瑞萨官网,依次点击 支持和设计→软件与工具→Development Tools,下滑找到如下安装包,点击下载安装。

连接
1
参照瑞萨官网下载的规格书了解demo板的管脚定义,或者直接观察demo板上的丝印文字参照下图,和J-Link连接。此demo板需要USB转安卓线单独供电。
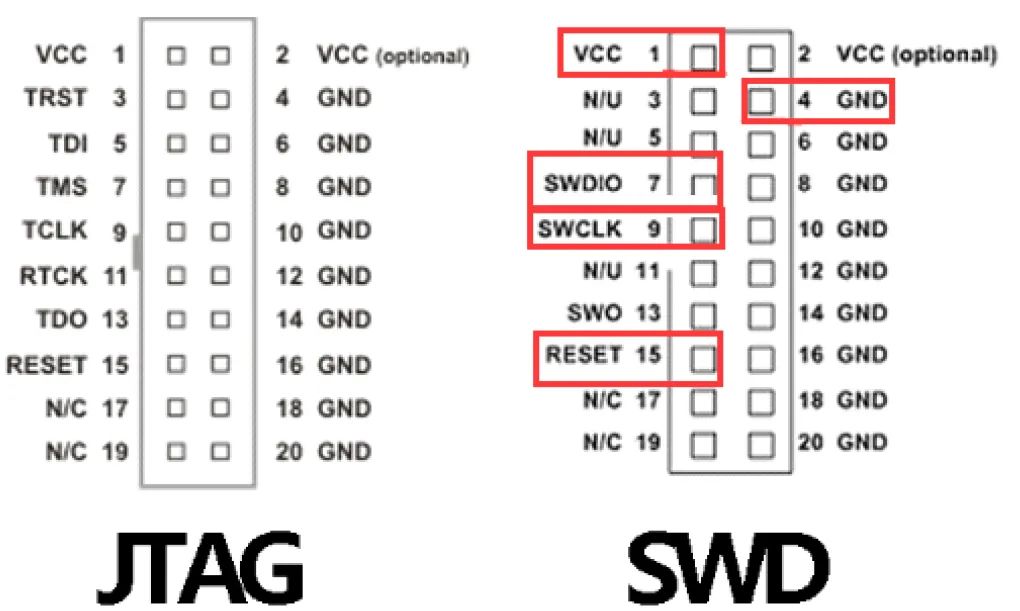
注意:延伸线(就是往开发板插的那条线)刚好反转了一下,请注意辨别。
2
参照下图连接,USB转串口工具和demo板连接

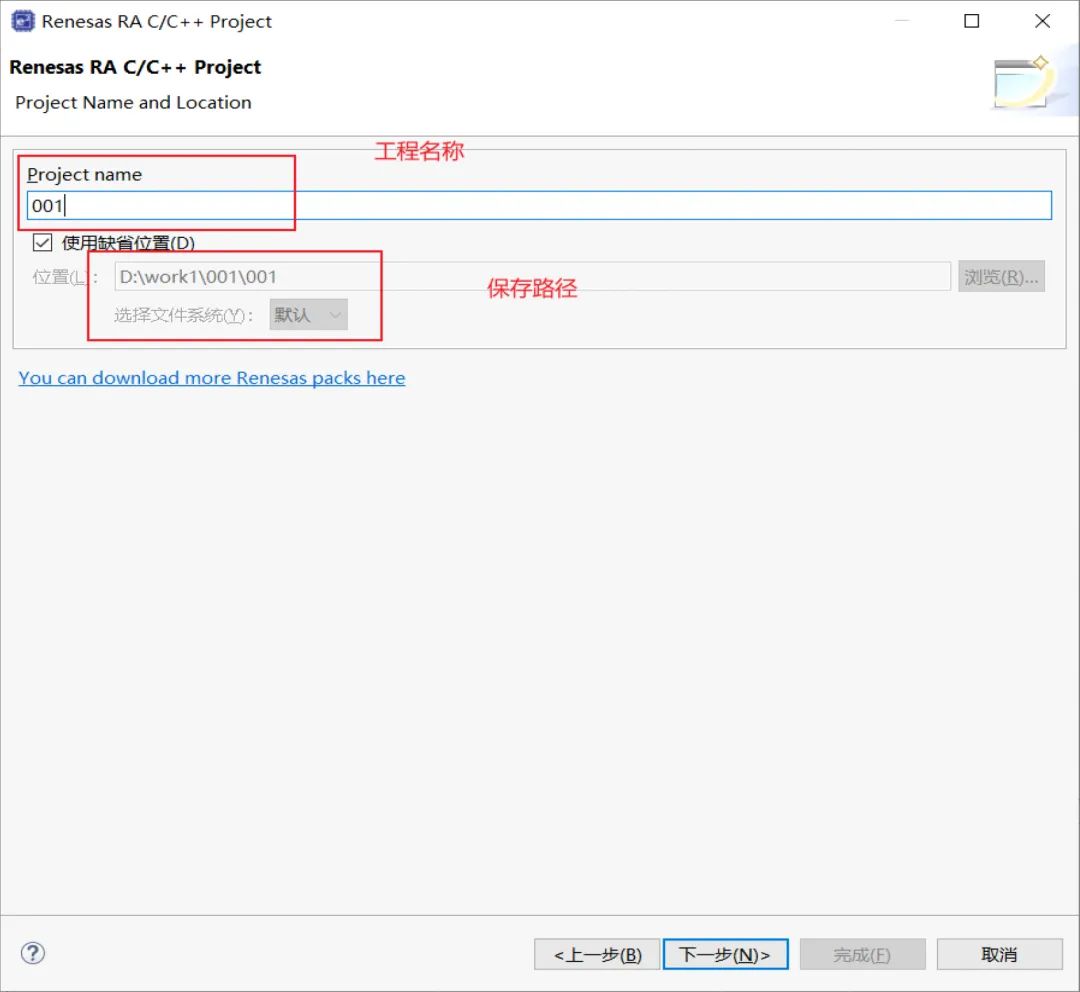
新建工程
打开e2 studio,按下图操作

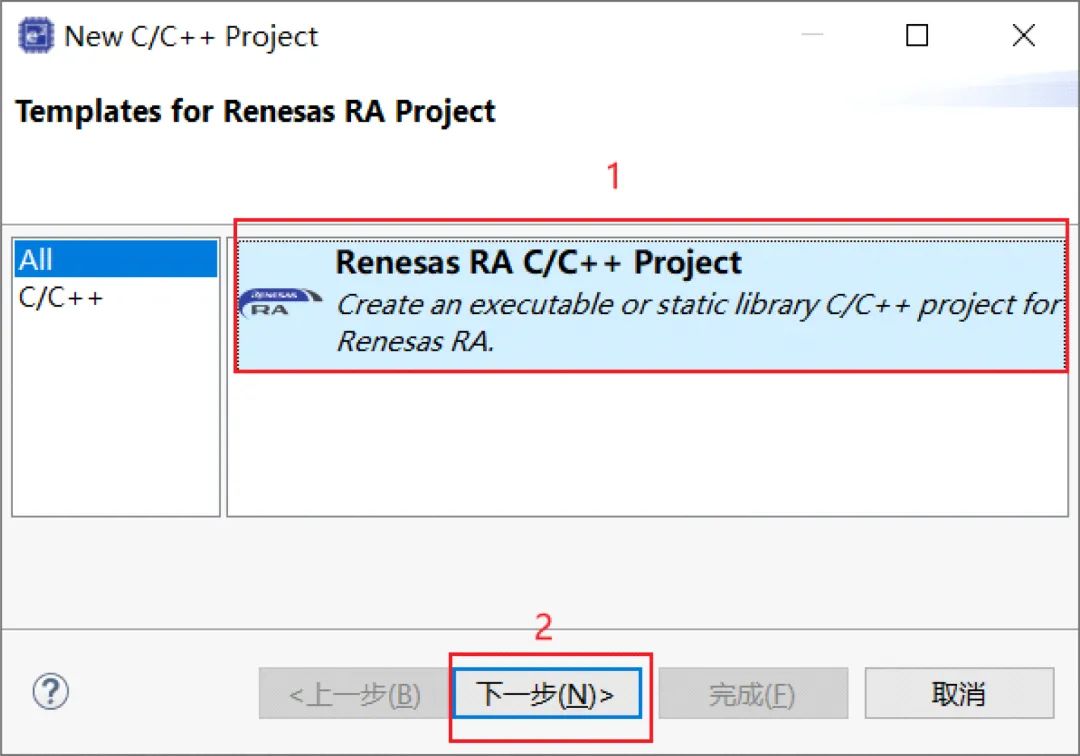
工程模板
保存工程路径。
芯片配置
使用R7FA2L1AB2DFL来进行演示。
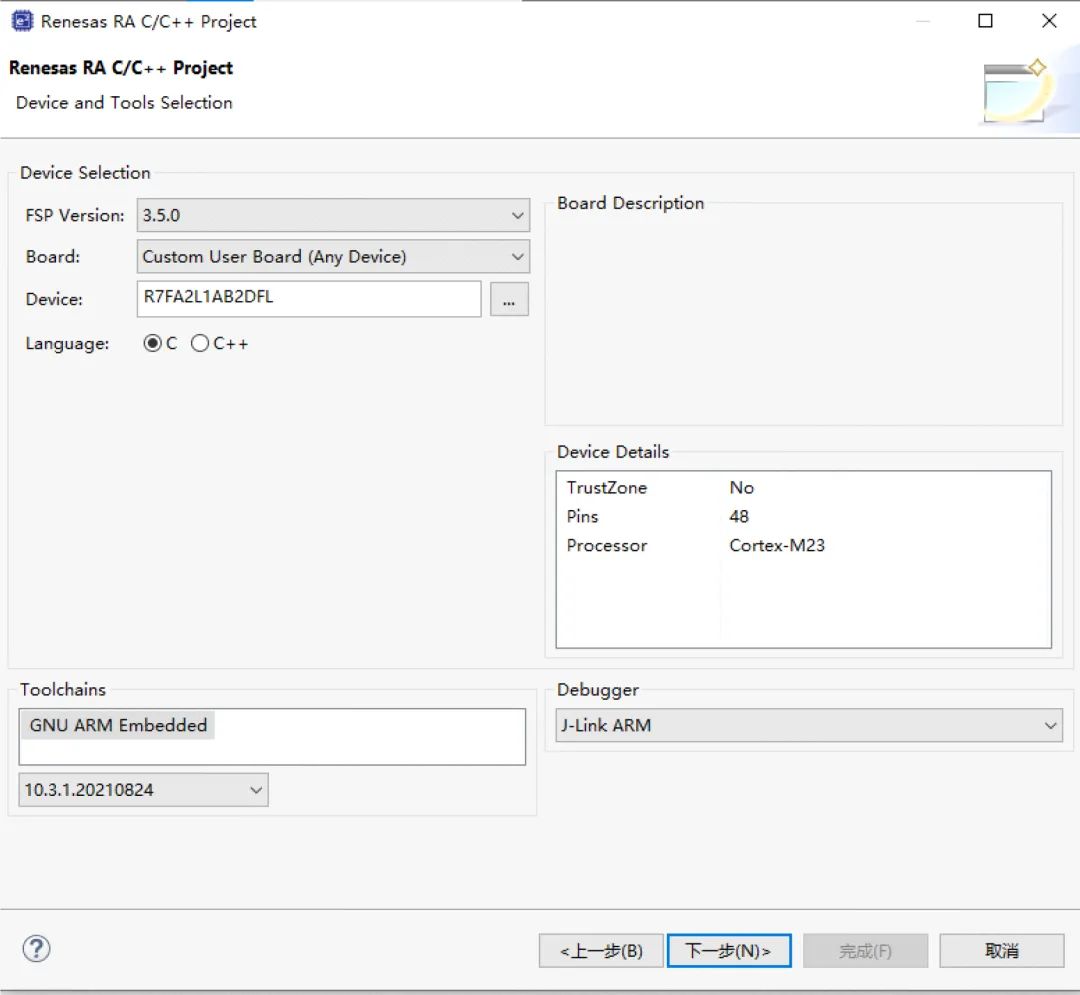
然后一直点击下一步,出现下图,按图选择再点完成即可。

定时器设置
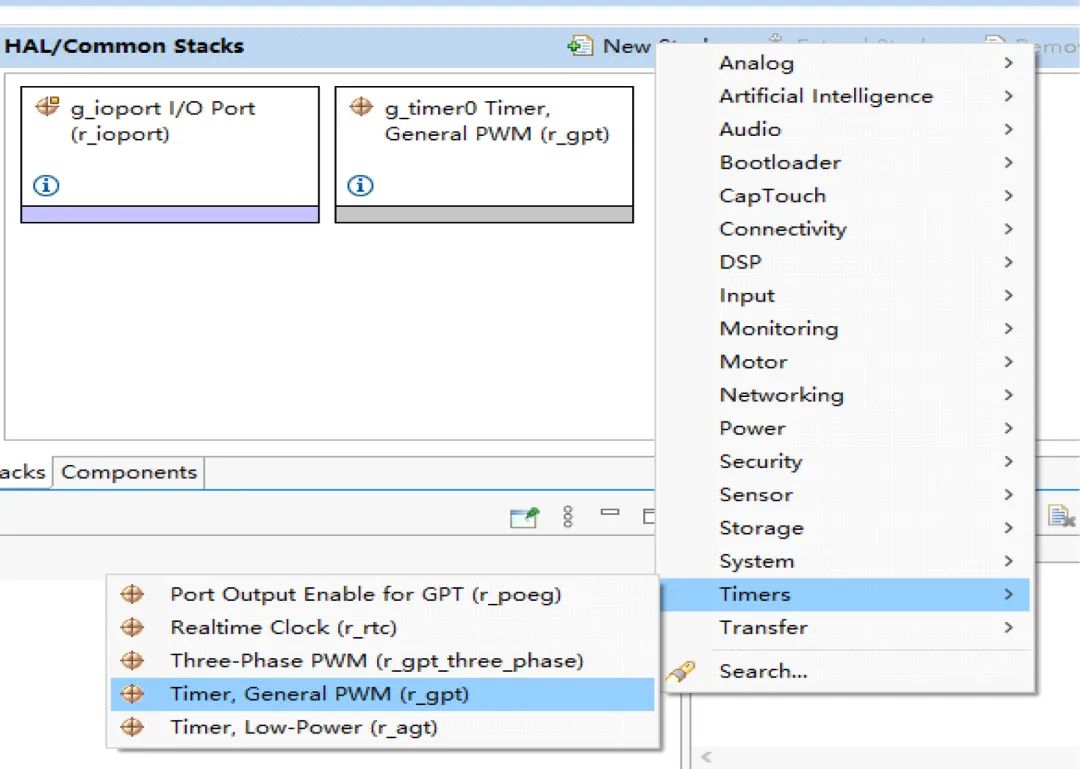
点击Stacks→New Stack→Timers→Timers,General PWM
设置100ms为一次。
选择计数单位为Milliseconds,计时周期为100
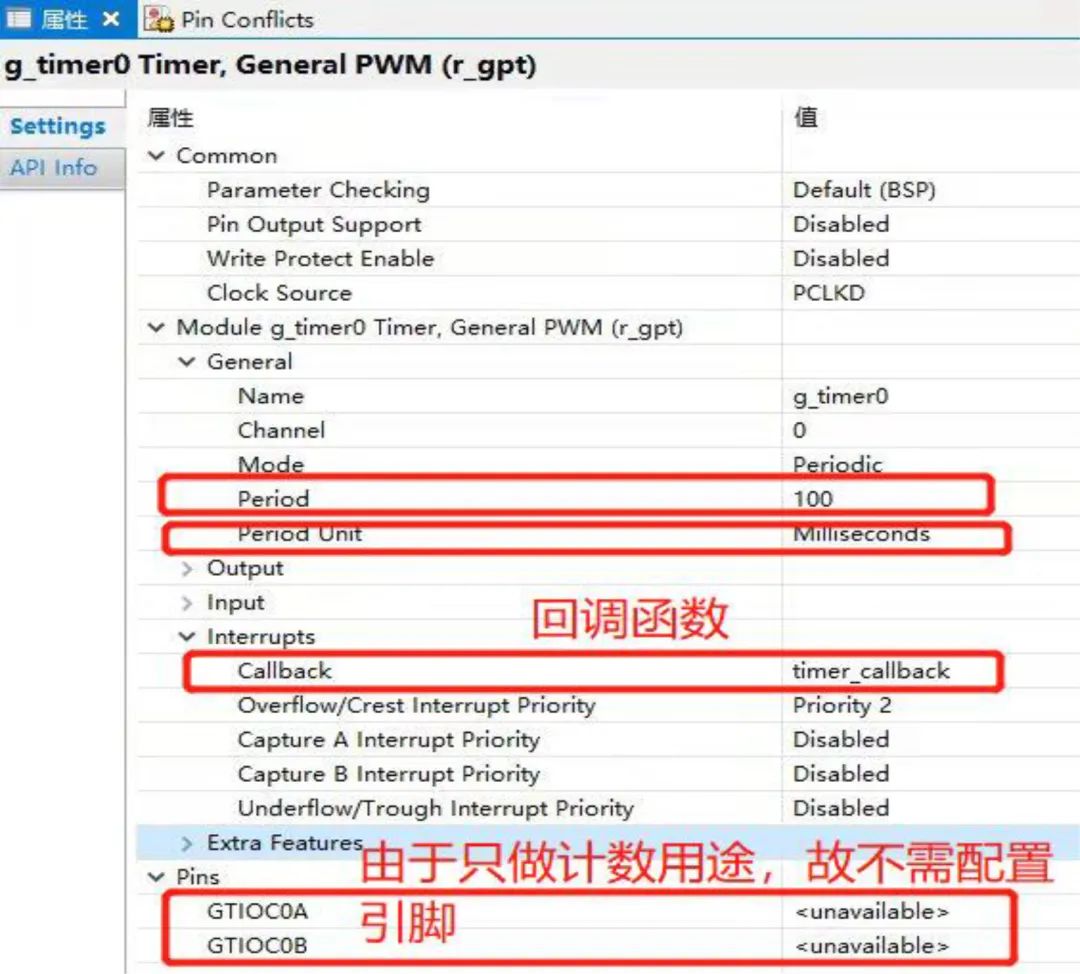
定时器回调函数timer0_callback()
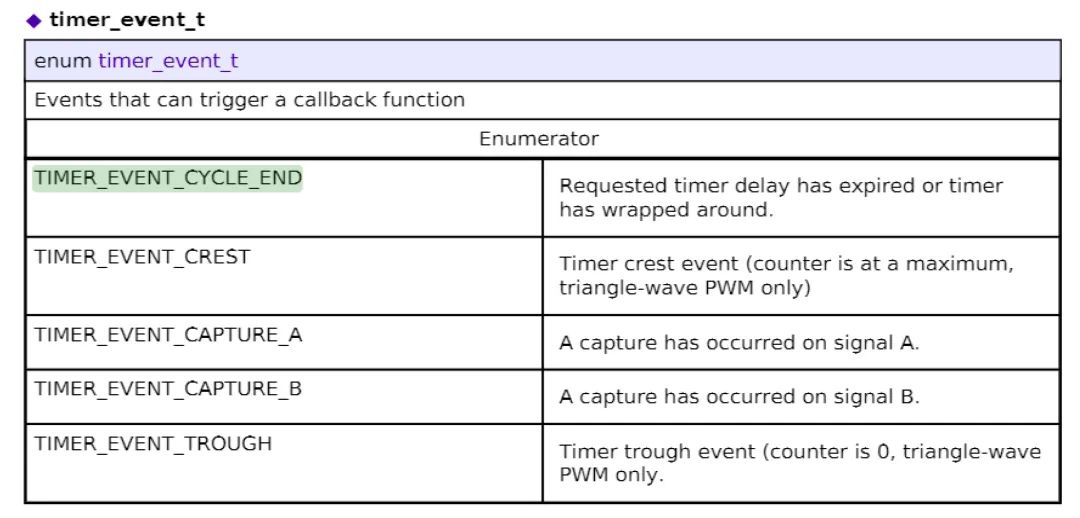
定时完毕可以用TIMER_EVENT_CYCLE_END进行判断。
设置一个标志为flag,当flag为20时执行操作并重置定时器,实现LED延时两秒功能。

定时器初始化
在void hal_entry(void)里初始化定时器,并开启

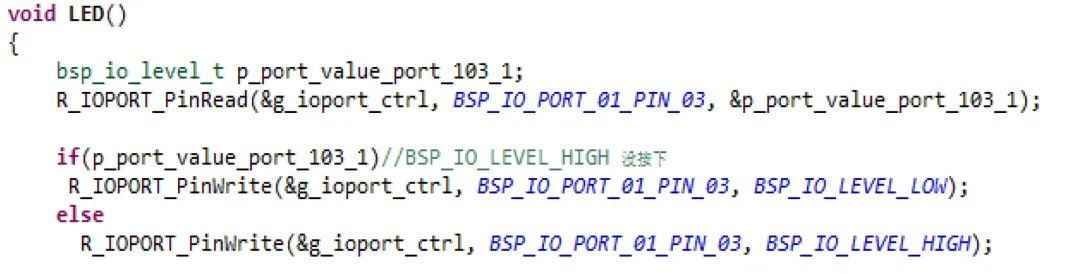
void LED()函数
读取led灯103的电平状态并手动将它翻转,实现定时器中断2s一次led灯闪烁
1
END
1

原文标题:RA2L1定时器中断
文章出处:【微信公众号:瑞萨MCU小百科】欢迎添加关注!文章转载请注明出处。
-
mcu
+关注
关注
146文章
17457浏览量
354401 -
瑞萨
+关注
关注
36文章
22322浏览量
87176
原文标题:RA2L1定时器中断
文章出处:【微信号:瑞萨MCU小百科,微信公众号:瑞萨MCU小百科】欢迎添加关注!文章转载请注明出处。
发布评论请先 登录
相关推荐
【瑞萨RA2L1入门学习】+Uart printf
【瑞萨RA2L1入门学习】+Key control LED
【瑞萨RA2L1入门学习】+Led flash
【瑞萨RA2L1入门学习】+UART测试
【瑞萨**RA2L1入门学习】+**UART测试实验
【瑞萨RA2L1入门学习】+开箱评测
【瑞萨RA2L1入门学习】+LED流水灯实验
【瑞萨RA2L1入门学习】+Key控制LED实验
【瑞萨RA2L1入门学习】3. printf输出
【瑞萨RA2L1入门学习】2. PWM呼吸灯
瑞萨RA家族精品RA2L1产品介绍

瑞萨电子RA2L1 MCU产品介绍


 工商网监
工商网监
评论