俗话说"工欲善其事必先利其器",之前在Ubuntu上运行的ROS项目都是用vim或者gedit编写和修改代码,然后在终端编译运行,很不方便,函数跳转查看都没办法实现。
所以今天我决定找一个方便的开发工具,也就是找一个像Windows上的VS那样的集成开发工具(IDE),ROS官网上有一个不同IDE的对比文章,网址在:
http://wiki.ros.org/IDEs
我选择使用VScode.下载安装好VScode后,在扩展栏安装C/C++,CMake,CMake Tools,Code Runner,ROS,Chinese 这些插件.接下来用一个简单的话题发布栗子来演示操作过程
创建ROS工作环境
首先新建一个文件夹,我命名为test_ros,在该文件夹中打开终端,执行以下命令来创建ROS工作环境:
mkdir src && cd src
catkin_init_workspace
cd ../
catkin_make
然后在VScode中打开test_ros文件夹,此时的文件目录如下
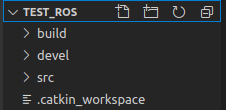
右键单击src,选择Create Catkin Package,Package命名为helloworld

添加roscpp, rospy作为依赖项

之后src目录下会出现以下文件:
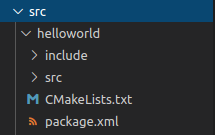
继续在src/helloworld/src目录下添加一个cpp文件,命名为helloworld.cpp,内容如下:
using namespace std;
int main(int argc, char** argv)
{
ros::init(argc, argv, "talker");
ros::NodeHandle n;
ros::Publisher chatter_pub = n.advertise("chatter", 1000);
ros::Rate loop_rate(10);
int count = 0;
while(ros::ok())
{
std_msgs::String msg;
std::stringstream ss;
ss << "hello world " << count;
msg.data = ss.str();
ROS_INFO("%s", msg.data.c_str());
chatter_pub.publish(msg);
ros::spinOnce();
loop_rate.sleep();
count++;
}
return 0;
}
此时会提示找不到ros/ros.h和std_msgs/String.h,我们继续通过后面的步骤来解决。
配置.json文件
接下来配置
c_cpp_properties.json,launch.json,tasks.json分别如下:
c_cpp_properties.json,用于指定C/C++类库和包含路径以及配置
按住Fn+F1,找到C/C++:编辑配置(JSON)

之后就会生成c_cpp_properties.json文件,修改文件内容如下,其中"/opt/ros/melodic/include"是
{
  "configurations": [
    {
      "name": "Linux",
      "includePath": [
        "${workspaceFolder}/**",
        "/opt/ros/melodic/include"
      ],
      "defines": [],
      "compilerPath": "/usr/bin/gcc",
      "cStandard": "c11",
      "cppStandard": "c++17",
      "intelliSenseMode": "clang-x64",
      "compileCommands": "${workspaceFolder}/build/compile_commands.json"
    }
  ],
  "version": 4
}
其中/opt/ros/melodic/include为ROS相关头文件所在的路径,此时可能仍然找不到ros/ros.h和std_msgs/String.h,继续运行以下命令即可在build文件夹下生成compile_commands.json文件
catkin_make -DCMAKE_EXPORT_COMPILE_COMMANDS=1
然后就可以找到ros/ros.h和std_msgs/String.h了
launch.json,用于调试
按住Fn+F5启动调试,就会生成launch.json,修改launch.json文件内容如下:
{
  // 使用 IntelliSense 了解相关属性。
  // 悬停以查看现有属性的描述。
  // 欲了解更多信息,请访问: https://go.microsoft.com/fwlink/?linkid=830387
  "version": "0.2.0",
  "configurations": [
      {
      "name": "(gdb) Launch",
      "type": "cppdbg",
      "request": "launch",
      "program": "${workspaceFolder}/devel/lib/helloworld/helloworld",// 表示可执行程序所在的路径,其中,${workspaceRoot}表示VScode加载的文件夹的根目录
      "args": [],
      "stopAtEntry": false,
      "cwd": "${workspaceFolder}",
      "environment": [],
      "externalConsole": false,
      "MIMode": "gdb",
      "setupCommands": [
        {
          "description": "Enable pretty-printing for gdb",
          "text": "-enable-pretty-printing",
          "ignoreFailures": true
        }
      ],
      //"preLaunchTask": "make build"//最好删了,不然会影响调试,每次调试都直接执行make build
    }
  ]
}
tasks.json,用于编译
按住Fn+F1,找到任务:配置任务,创建tasks.json文件,修改tasks.json文件内容如下:
{
  "version": "2.0.0",
  "tasks": [
    {
      "label": "catkin_make", //代表提示的描述性信息
      "type": "shell", //可以选择shell或者process,如果是shell代码是在shell里面运行一个命令,如果是process代表作为一个进程来运行
      "command": "catkin_make",//这个是我们需要运行的命令
      "args": ["-DCMAKE_EXPORT_COMPILE_COMMANDS=1"],//如果需要在命令后面加一些后缀,可以写在这里,比如-DCATKIN_WHITELIST_PACKAGES=“pac1;pac2”
      "group": {"kind":"build","isDefault":true},
      "presentation": {
        "reveal": "always"//可选always或者silence,代表是否输出信息
      },
      "problemMatcher": "$msCompile"
    },
  ]
}
修改CMakeLists.txt
继续修改src/helloworld/CMakeLists.txt文件,在其中添加以下程序:
catkin_package(
 CATKIN_DEPENDS
)
# 头文件路径
include_directories(
include
 ${catkin_INCLUDE_DIRS}
)
# 生成可执行文件
add_executable( helloworld src/helloworld.cpp )
# 链接库
target_link_libraries(helloworld ${catkin_LIBRARIES})
结果测试
按住Ctrl+Shift+B编译该程序,就可以看到与catkin_make一样的编译过程
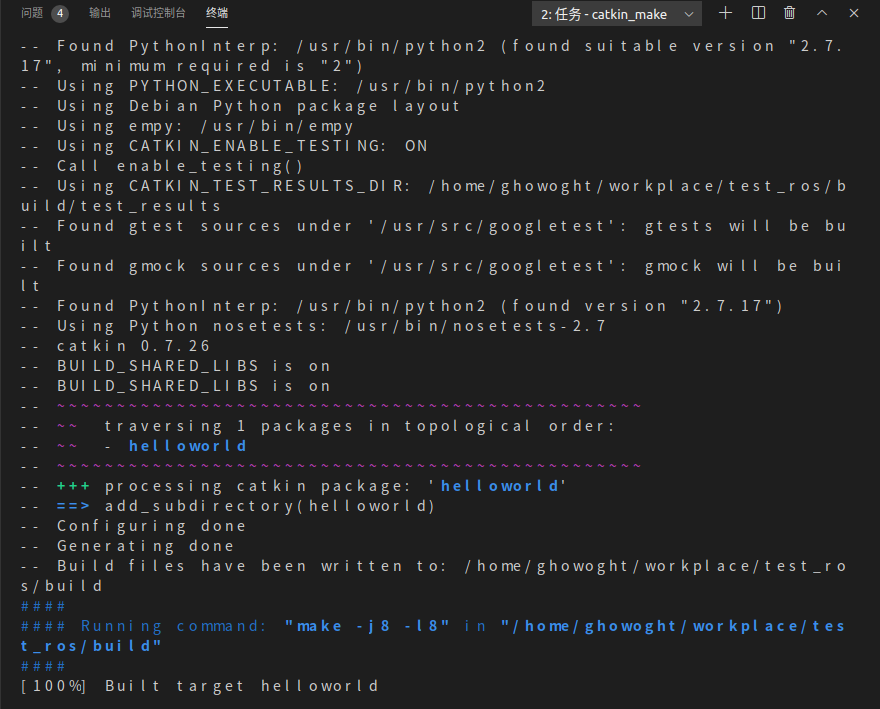
最后测试生成的可执行文件.新开一个终端,运行ROS的master节点,然后按住Fn+F5运行生成的可执行文件,结果如下;
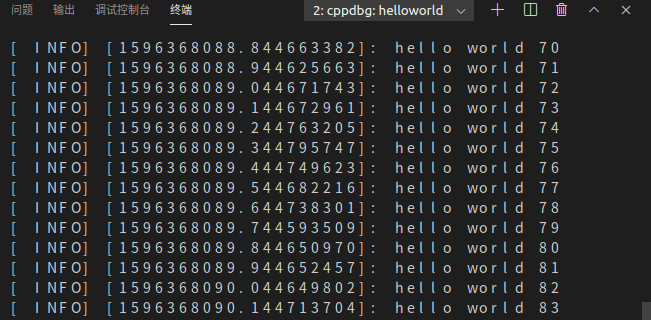
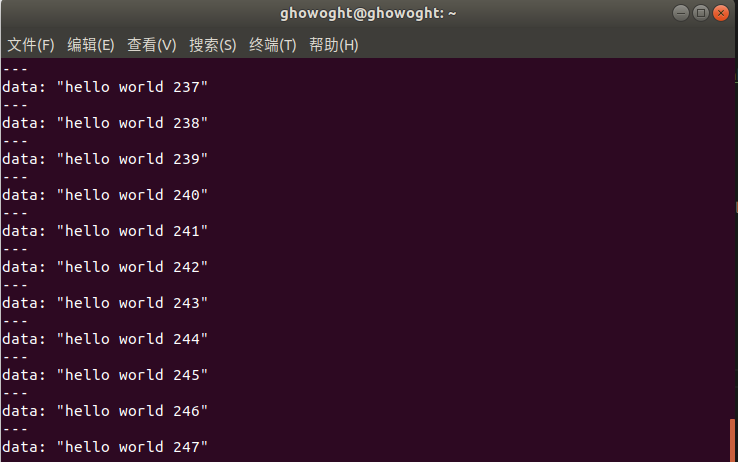
在另一个终端中输出该程序发布的话题:
这样,VScode的ROS开发环境就搭建好了
审核编辑 :李倩
-
函数
+关注
关注
3文章
4350浏览量
63052 -
ROS
+关注
关注
1文章
281浏览量
17140 -
vscode
+关注
关注
1文章
157浏览量
7896
原文标题:使用VScode搭建ROS开发环境
文章出处:【微信号:vision263com,微信公众号:新机器视觉】欢迎添加关注!文章转载请注明出处。
发布评论请先 登录
相关推荐
VSCODE+STM32开发环境搭建方式
在VSCode上搭建类似Keil的开发环境
VScode + keil开发环境搭建
基于vscode编辑器的stm32 Arduino开发环境如何去搭建呢
求Windows下VSCode + kendryte插件 搭建K210开发环境指南
ubuntu18安装vscode搭建嵌入式linux开发环境

VSCode搭建STM32单片机开发环境

GD32系列总结 - VScode + keil开发环境搭建

arduino / VScode+platformIO搭建esp32/esp8266编译环境(一篇足矣)


 使用VScode搭建ROS开发环境


评论