 风火轮科技YY3568开发板新品上市
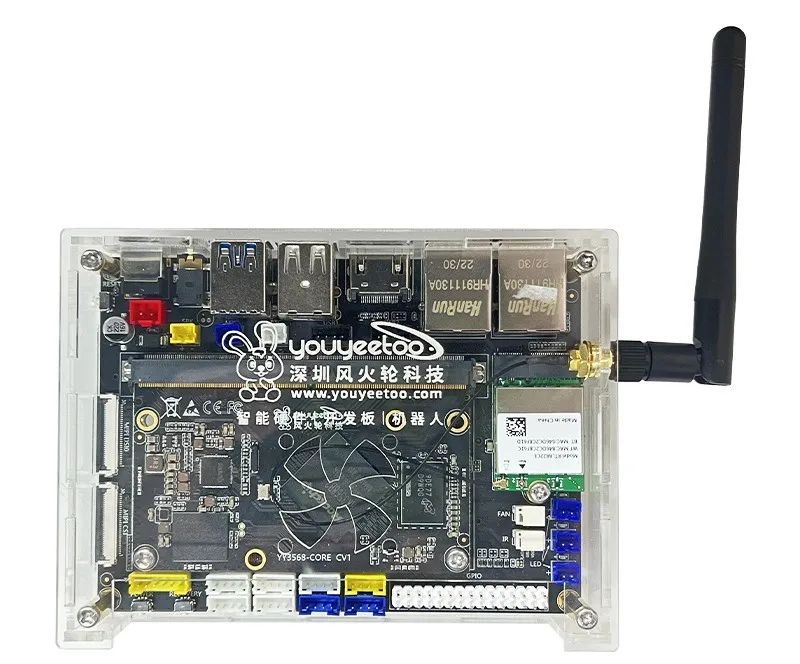
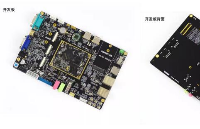
风火轮近来又推出一款新的嵌入式主板YY3568,它是一款基于瑞芯微RK3568 4核处理器的ARM主板,性价比极高;现在瑞芯微的旗舰款是rk3588主打性能,这个rk3568是主打性价比的定位,接口丰富,算力能满足大部份端级的需求,价格又做到极低,用到机器人、广告机、门禁闸机,自动售卖机控制等等走量的场景最适合,给这个本来就热闹的市场加入了新的活力! 采用核心板+功能底板的设计方式
RK3568采用四核64位Cortex-A55处理器,全新ARM V8.2-A架构,主频高达2.0GHZ,Mali G52,1TOPS算力。
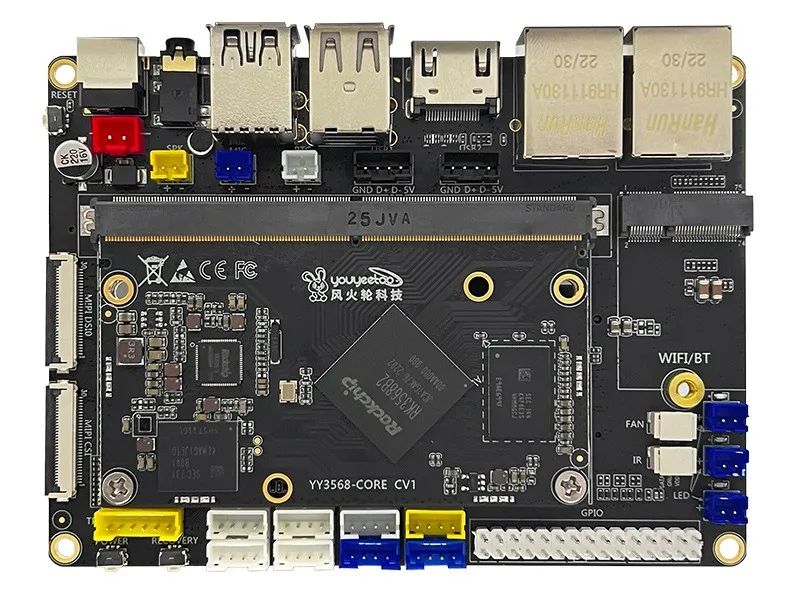
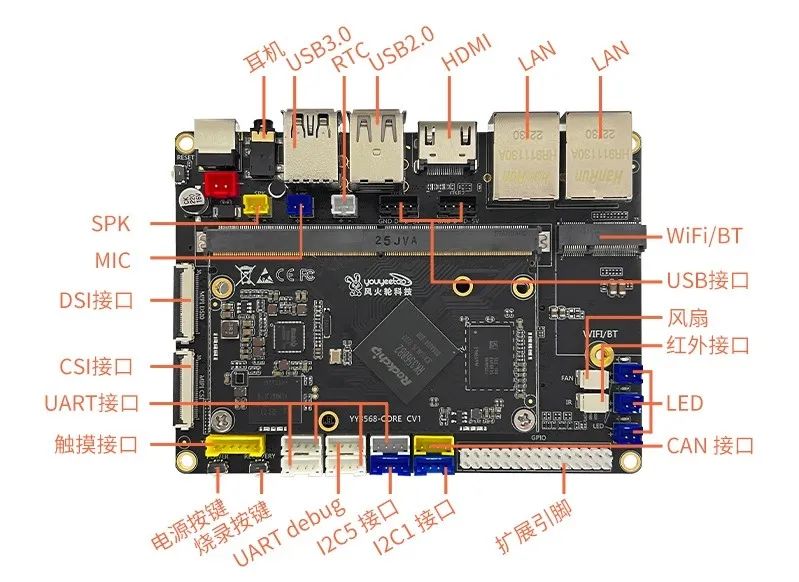
丰富的显示接口:2路DSI,1路HDMI,1路EDP(支持触摸)
多路网络接口:双千兆网口,5G WIFI,BT5.0,4G LTE
音频接口齐全:功放SPK,MIC,耳机接口
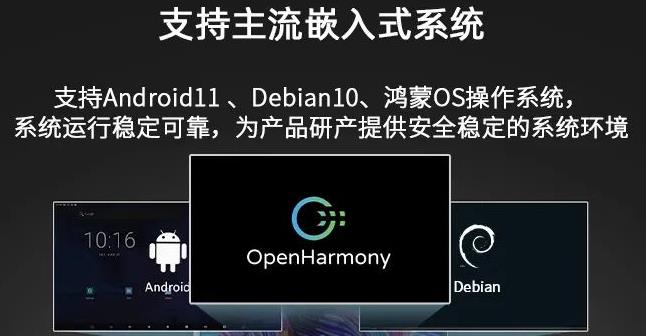
支持三大主流操作系统:
为何选择YY3568呢?
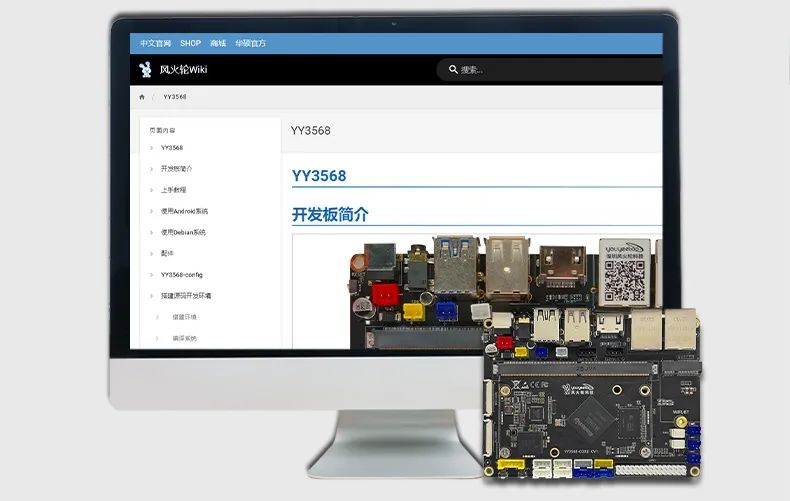
相对市面其他的RK3568开发板,YY3568几乎把所有芯片外设接口全部引出,它设计了双网口,4G,ssd,wifi蓝牙,5串口,双IIc,甚至还有汽车常用的can口,几乎常用的接口都有了。这在ARM主板中很少见的,而且体积做到了小巧精致,只有一个手掌大小,接口布局合理。
采用了核心板与功能接口底板分开的设计方式,可灵活地将核心板用于实际的项目功能底板上。
YY3568将所有的屏幕接口全部引出(拥有MIPI-DSI,HDMI,EDP),可满足多屏异显。但是其他同类产品开发板只设计部分接口出来。
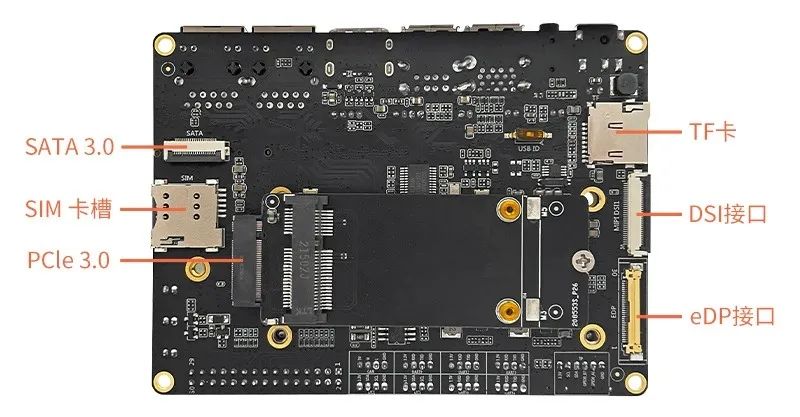
通过扩展转接板,引出了标准SATA3.0接口,支持SATA硬盘扩展,速度更快,更加稳定。
提供了丰富的可选配件(配件种类持续提供):
4G网络模块:https://i-item.jd.com/10068467248509.html
7寸触摸屏:https://i-item.jd.com/10069253972271.html
11.6寸触摸屏:https://i-item.jd.com/10069255088264.html
10.1寸HDMI触摸屏:https://i-item.jd.com/10041564226786.html
4K MIPI摄像头:https://i-item.jd.com/10068468305449.html
红外遥控器:https://i-item.jd.com/10069256402403.html
M.2固态硬盘:https://i-item.jd.com/10069255507480.html
提供了丰富的开发资料:提供固件,驱动,源码,底板参考设计原理图PDF,环境搭建和编译说明等。
WIKI资料官网:https://wiki.youyeetoo.cn/zh/YY3568
YY3568可选类型分为四种:
| 型号 | 内存 | 硬盘 | WIFI |
|---|---|---|---|
| 1 | 4G | 32G | × |
| 2 | 2G | 16G | × |
| 3 | 4G | 32G | √ |
| 4 | 2G | 16G | √ |
-
ARM
+关注
关注
134文章
9164浏览量
368998 -
嵌入式主板
+关注
关注
7文章
6086浏览量
35579 -
瑞芯微
+关注
关注
24文章
432浏览量
51510 -
RK3568
+关注
关注
4文章
525浏览量
5222
原文标题:风火轮科技又发新品啦--YY3568开发板
文章出处:【微信号:风火轮技术团队,微信公众号:风火轮技术团队】欢迎添加关注!文章转载请注明出处。
发布评论请先 登录
相关推荐
【新品体验】贝启科技BQ3568HM开源鸿蒙开发板免费试用
RK3568内置MCU开发介绍之一

国产核心板全面进攻-RK3568开发板评测

新品7折购!米尔RK3568国产开发板
【每周推荐】采用11代Intel CPU,基于youyeetoo X1开发板搭建少儿AI智能STEAM积木平台
【youyeetoo X1 windows 开发板体验】+ 影音处理和AI模型移植
YY3568多核异构(Linux+RT-Thread)--启动流程
讲讲RK3568开发板上的多核加载流程


 工商网监
工商网监
评论