<前言>
在IPC 安防监控的晶片平台上做开发,因为产品高机率都有自带ethernet的功能,在开发上常常需要反覆的更新测试程式,或是传输录像档案到电脑上作各种RAW/YUV//H264/H265等码流分析,若能够透过ethernet,直接在平台与电脑做线上的档案传输,是非常好用的方法,本文将基于Novatek NT98526x/NT9852x晶片上,介绍2常用的Linux/Window档案共享的方法。
1. How to mount a remote directory by NFS?
1.1 Download window NFS server tool
这边是在window 10 上面所做的演示,我们使用winnfsd 工具,可以到github上下载(https://github.com/winnfsd/winnfsd)。
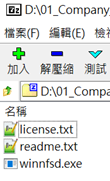
下载winnfsd后解压缩,可以看到winnfsd.exe执行档案。
1.2 Windows side
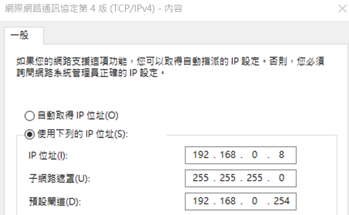
首先确保电脑和平台(52x/56x)之间的网路已经连通,并且可以互ping。52x/56x的预设IP为192.168.0.3,这边我们将电脑设定为192.168.0.8。
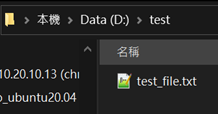
假设 windows上欲分享的资料夹名称和路径为D:\test。
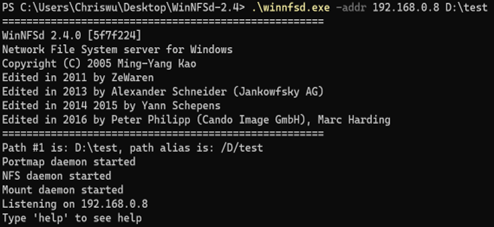
以系统管理者身份,开启Windows PowerShell,并且进入到winnfsd所在的资料夹。
执行以下命令,以启动NFS Server:
$ .\winnfsd.exe -addr 192.168.0.8 D:\test
1.3 Linux side
Kernel config需要开启 NFS Client,并重新编译kernel和烧录到52x/56x
File systems → Enable POSIX file locking API
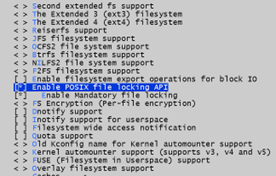
File systems → Network File Systems → NFS client support

General setup → Configure standard kernel features (expert users) → Multiple users, groups and capabilities support

于52x/56x terminal上执行以下mount命令,假设mount point为mnt/sd2。须注意mount remote路径名称的规则。
$ mount -t nfs -o nolock -o tcp 192.168.0.8:/D/test /mnt/sd2

2. How to mount a remote directory by CIFS?
2.1 Windows side
首先确保电脑和平台(52x/56x)之间的网路已经连通,并且可以互ping。52x/56x的预设IP为192.168.0.3,这边我们将电脑设定为192.168.0.8。
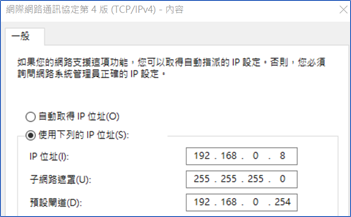
假设 windows上欲分享的资料夹名称和路径为D:\test_cifs。
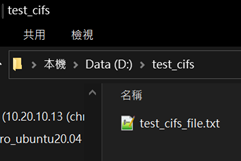
2.1.1 Share Directory Permission Settings
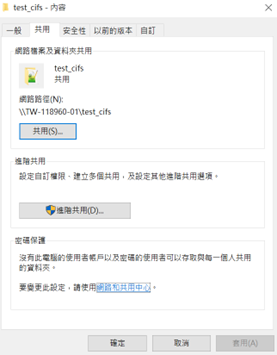
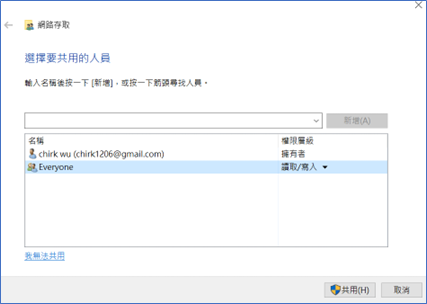
在欲共用的资料夹选项,选择共用分页→共用,建立 Everyone 权限
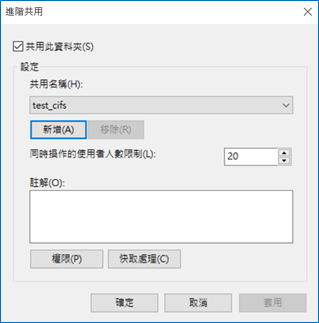
共用分页→进阶共用,建立共用资料夹的共用名称
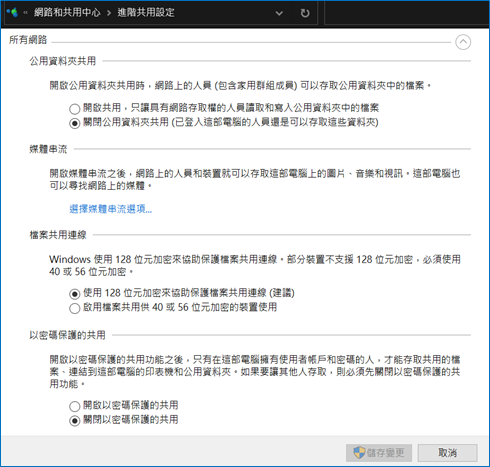
共用分页→密码保护→网路和共用中心→所有网路→以密码保护的共用,关闭密码设定。
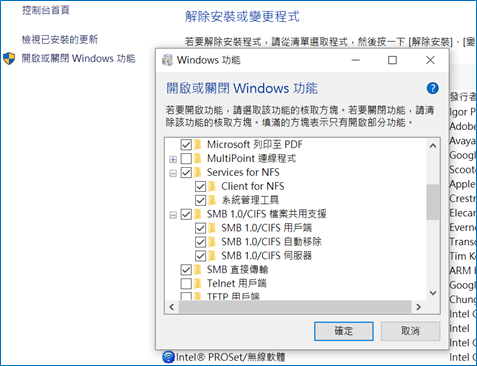
控制台→程式和功能→开启或关闭Windows功能,确定有开启Samba CIFS档案共用 (电脑需要重开机以生效)。
2.2 Linux side
Kernel config需要开启 CIFS,并重新编译kernel和烧录到52x/56x
File systems → Network File Systems → SMB3 and CIFS support (advanced network filesystem)
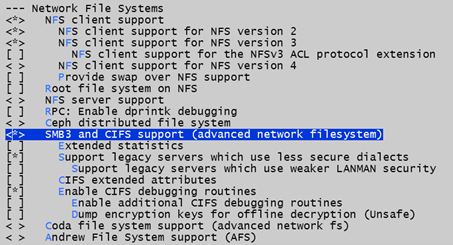
于52x/56x terminal上执行以下mount命令,假设mount point为mnt/sd2。须注意mount remote路径名称的规则,因为没有密码,password后面要带一个空格。由于samba的版本可能不同,参数可能会需要加入vers来控制。
$ mount -t cifs //192.168.0.8/test_cifs /mnt/sd2 -o vers=1.0,username=Everyone,password=

-
晶片
+关注
关注
1文章
405浏览量
31635
发布评论请先 登录
相关推荐
低功耗高效捕捉!Novatek NT98568+OmniVision OS04E10实现完美Preroll方案
如何实现NFS服务搭建

CC13x1x3、CC26x1x3 Simplelink™无线MCU技术参考手册

模组Locator应用指导——以NT26U为例

CC13x2x7和CC26x2x7 SimpleLink无线MCU技术参考手册

NT36672S用于LTPs TFT LCD的单片触摸显示驱动器集成器件英文手册
CR3015NT0XX-规格书
昂科烧录器支持MindMotion灵动微电子的32位微控制器MM32L052NT


 学技术 | Novatek iVot NT9852x NT9856x Linux Mounting by NFS or CIFS


评论