一、固件烧写
RV社区IMG下载地址(适用visionfive2-v1.3B的openwrt固件---集成了10余种我日常使用的插件。 - 昉·星光 2(中文论坛) - RVspace Forum)。
将IMG从weiyun上下载下来,利用U盘烧写工具,我比较喜欢和习惯Rufus,将openwrt-visionfive2-generic-visionfive2-ext4-sdcard.img烧进TF卡,然后上电启动。
U-Boot SPL 2021.10 (Feb 28 2023 - 21:44:53 +0800)
DDR version: dc2e84f0.
Trying to boot from SPI
OpenSBI v1.2
____ _____ ____ _____
/ __ \ / ____| _ \_ _|
| | | |_ __ ___ _ __ | (___ | |_) || |
| | | | '_ \ / _ \ '_ \ \___ \| _ < | |
| |__| | |_) | __/ | | |____) | |_) || |_
\____/| .__/ \___|_| |_|_____/|____/_____|
| |
|_|
Platform Name : StarFive VisionFive V2
Platform Features : medeleg
Platform HART Count : 5
Platform IPI Device : aclint-mswi
Platform Timer Device : aclint-mtimer @ 4000000Hz
Platform Console Device : uart8250
Platform HSM Device : jh7110-hsm
Platform PMU Device : ---
Platform Reboot Device : pm-reset
Platform Shutdown Device : pm-reset
Firmware Base : 0x40000000
Firmware Size : 292 KB
Runtime SBI Version : 1.0
Domain0 Name : root
Domain0 Boot HART : 1
Domain0 HARTs : 0*,1*,2*,3*,4*
Domain0 Region00 : 0x0000000002000000-0x000000000200ffff (I)
Domain0 Region01 : 0x0000000040000000-0x000000004007ffff ()
Domain0 Region02 : 0x0000000000000000-0xffffffffffffffff (R,W,X)
Domain0 Next Address : 0x0000000040200000
Domain0 Next Arg1 : 0x0000000042200000
Domain0 Next Mode : S-mode
Domain0 SysReset : yes
Boot HART ID : 1
Boot HART Domain : root
Boot HART Priv Version : v1.11
Boot HART Base ISA : rv64imafdcbx
Boot HART ISA Extensions : none
Boot HART PMP Count : 8
Boot HART PMP Granularity : 4096
Boot HART PMP Address Bits: 34
Boot HART MHPM Count : 2
Boot HART MIDELEG : 0x0000000000000222
Boot HART MEDELEG : 0x000000000000b109
U-Boot 2021.10 (Feb 28 2023 - 21:44:53 +0800), Build: jenkins-VF2_515_Branch_SDK_Release-31
CPU: rv64imacu
Model: StarFive VisionFive V2
DRAM: 4 GiB
MMC: sdio0@16010000: 0, sdio1@16020000: 1
Loading Environment from SPIFlash... SF: Detected gd25lq128 with page size 256 Bytes, erase size 4 KiB, total 16 MiB
*** Warning - bad CRC, using default environment
StarFive EEPROM format v2
稍等片刻,进入openWRT。
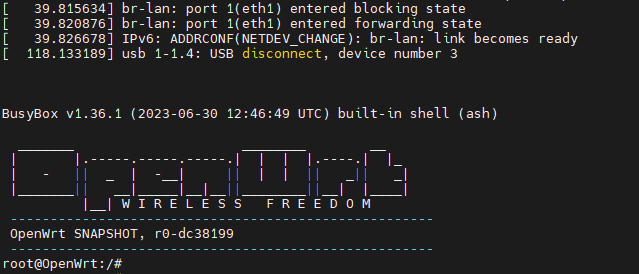
看看系统信息:
root@OpenWrt:/# uname -a
Linux OpenWrt 6.1.35 #0 SMP Fri Jun 30 12:46:49 2023 riscv64 GNU/Linux
root@OpenWrt:/#
主要思路是先把VF2网络配通,其他小功能可以直接在openWRT的网页管理侧去配置。
VF2通过MOTORCOMM(裕太微电子)的YT8531C提供千兆以太网连接能力。本次计划eth0连接WAN口,eth1连接LAN口,暂时不涉及WiFi模块配置。具体配置如下,WAN口连接家用路由器,通过DHCP获取IP,LAN口配置成192.168.3.xx,跟WAN网段区分。
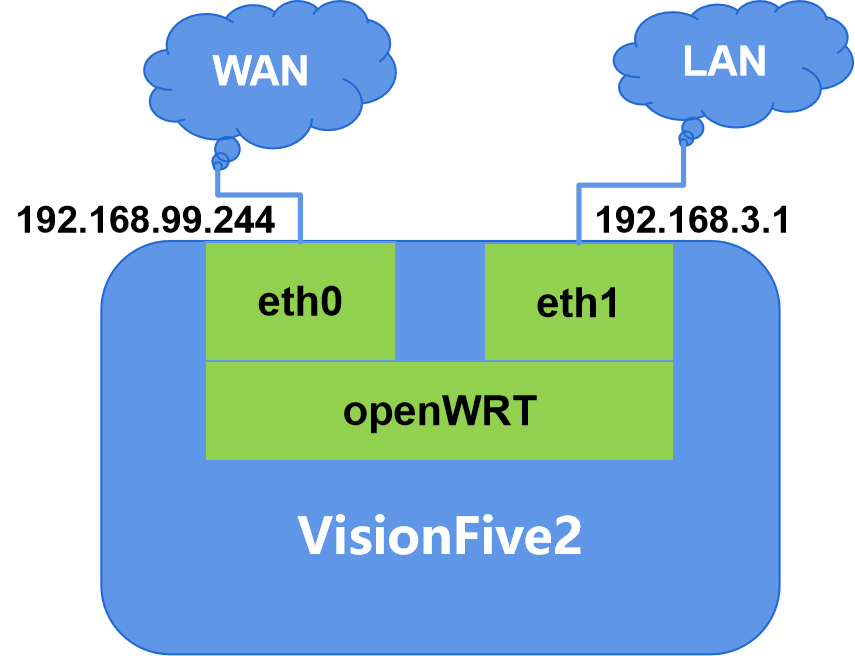
具体通过VF2的串口,按照上述思路直接修改/etc/config/network 文件成如下内容(其中WAN6可以删除,没啥用途):
root@OpenWrt:/# cat /etc/config/network
config interface 'loopback'
option device 'lo'
option proto 'static'
option ipaddr '127.0.0.1'
option netmask '255.0.0.0'
config globals 'globals'
option ula_prefix 'fd1f:3d6d:77a0::/48'
config interface 'wan'
option device 'eth0'
option proto 'dhcp'
config interface 'wan6'
option device 'eth0'
option proto 'dhcpv6'
config device
option type 'bridge'
option name 'br-lan'
list ports 'eth1'
config interface 'lan'
option proto 'static'
option device 'br-lan'
option ipaddr '192.168.3.1'
option netmask '255.255.255.0'
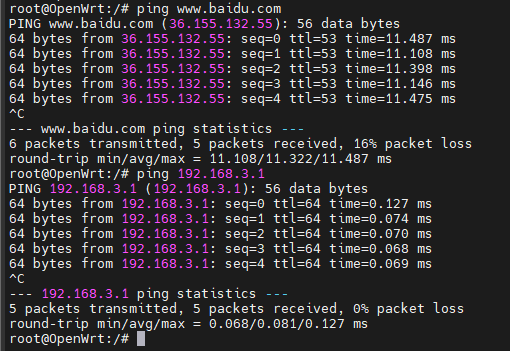
然后保存文件,并通过/etc/init.d/network restart 重启系统网络服务。然后使用ping工具简单测试下网路是否通畅:
一切OK,PC先断WiFi并双绞线连接至VF2的eth1继续测试,可以看到PC已经拿到LAN内IP,192.168.3.204。
三、系统体验
PC浏览器中敲入http://192.168.3.1/ 登录openWRT管理系统。
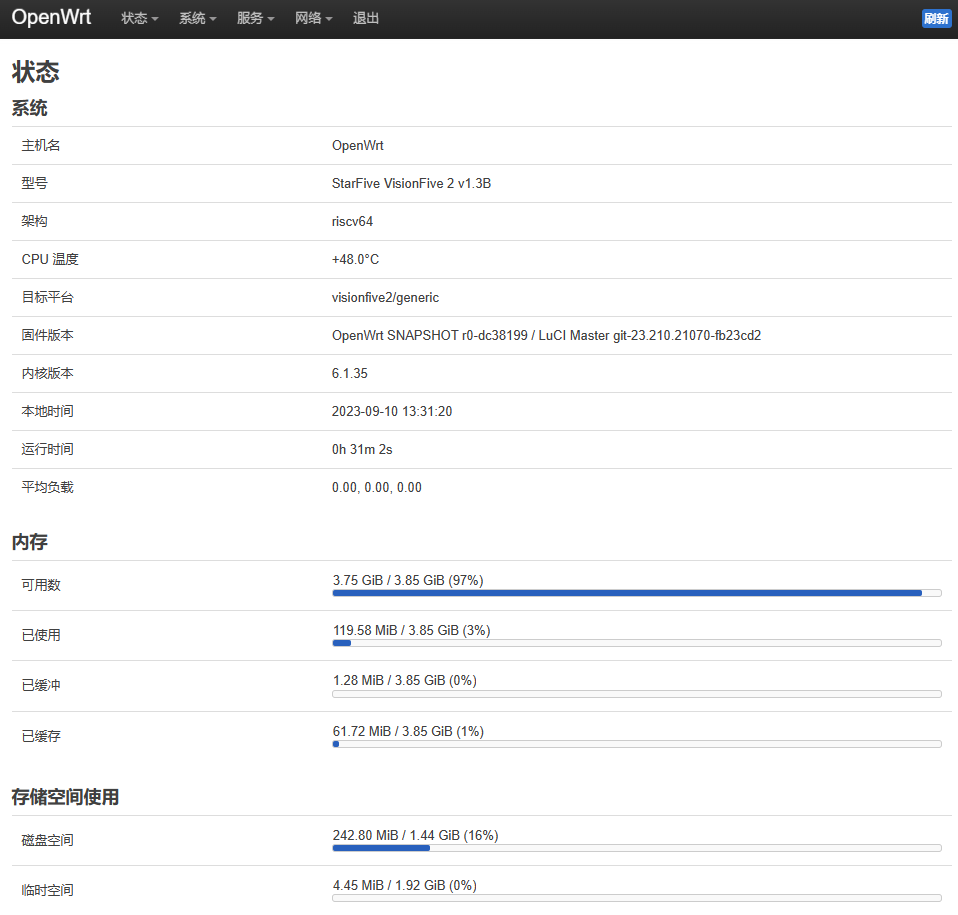
(一)系统状态
先看看状态,一些基本信息:
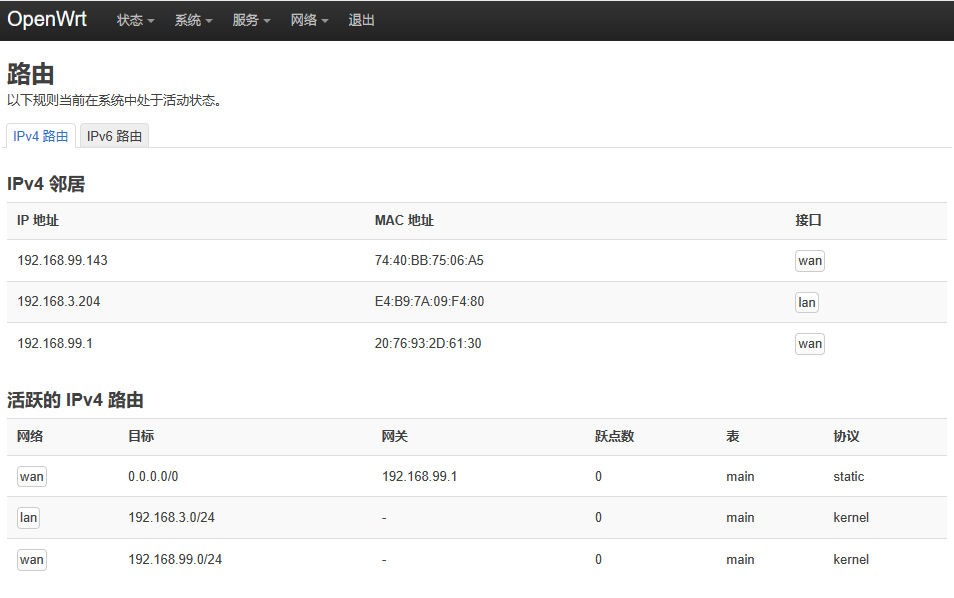
(二)路由
当前的IPV4路由表,IPV6暂无内容,可以看出2个网段路由的规则:
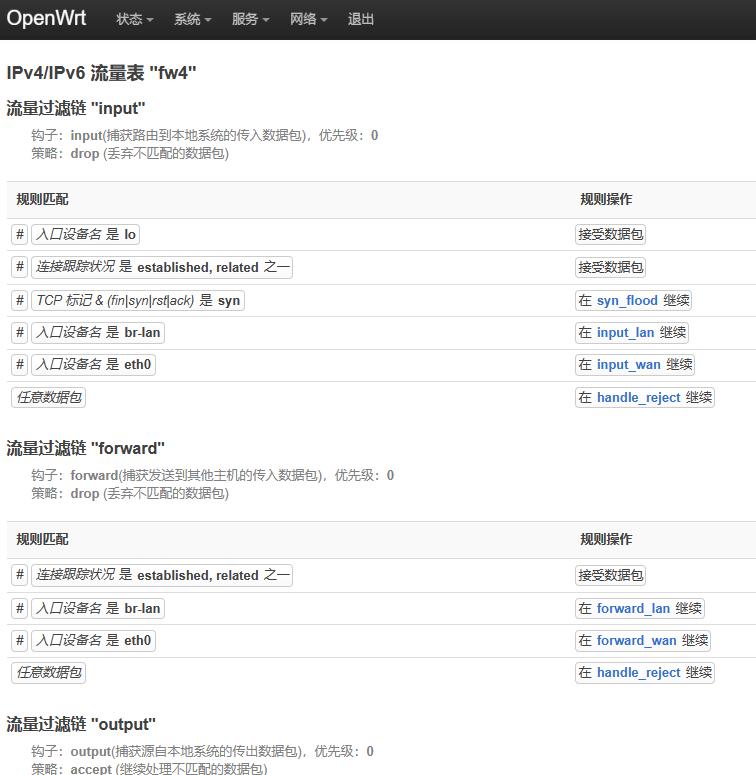
(三)防火墙
主要是iptables和nftables的一些规则,没啥特殊需求暂时不设置。
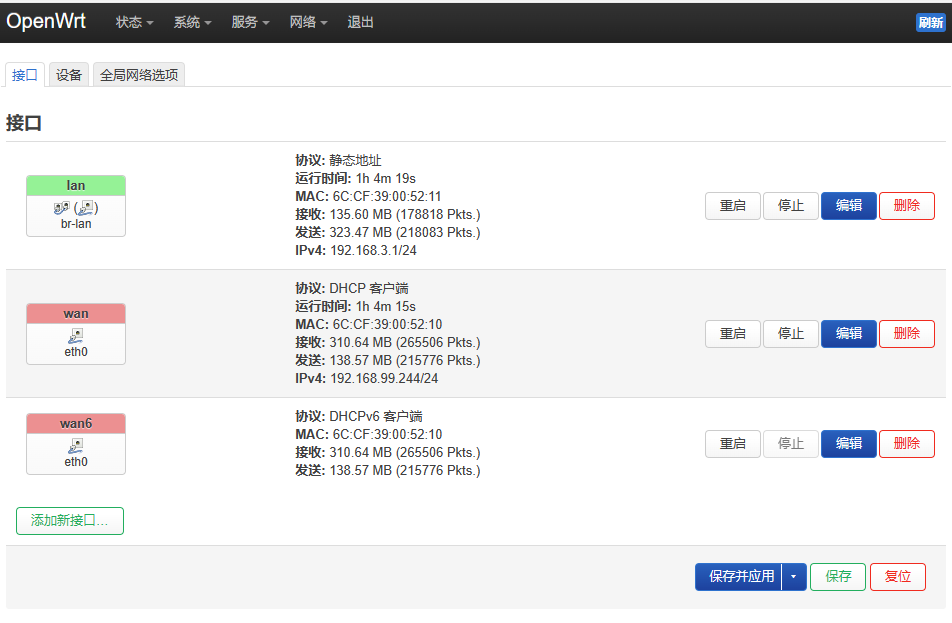
(四)网络接口
网络接口的信息,bridge-LAN(eth1)和WAN(eth0)的统计信息。
(五)服务
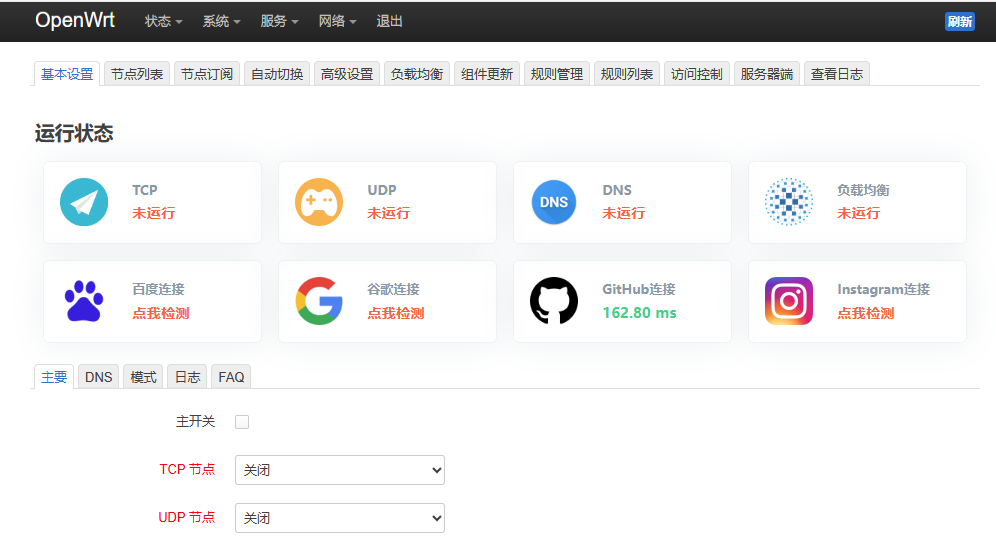
这里应该是最好玩的地方,各种有意思的插件,具体没配置。
四、网络测试
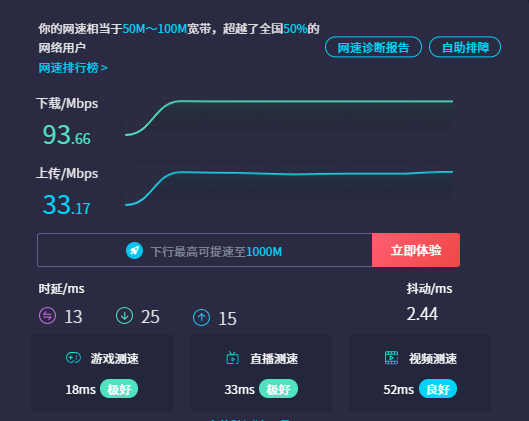
测试是在PC端使用网页测速工具(测速网 - 专业测网速, 网速测试, 宽带提速, 游戏测速, 直播测速, 5G测速, 物联网监测 - SpeedTest.cn),简单测试结果如下。
再看看openWRT上的一些负载、流量和连接信息。
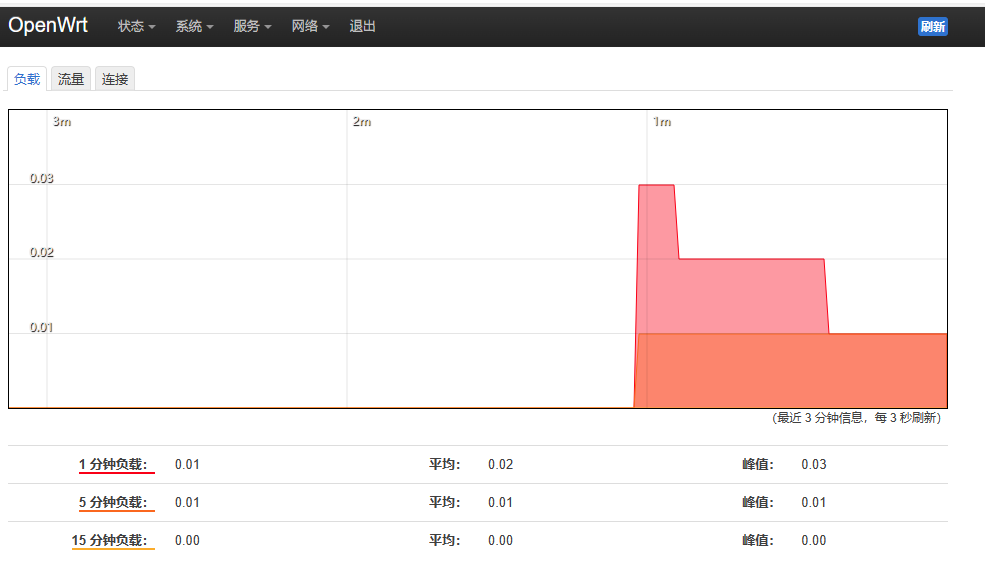
(一)负载
网络测试跑起来后,系统负载有明显的增加,但是对于千兆网卡来说,这都不是事。
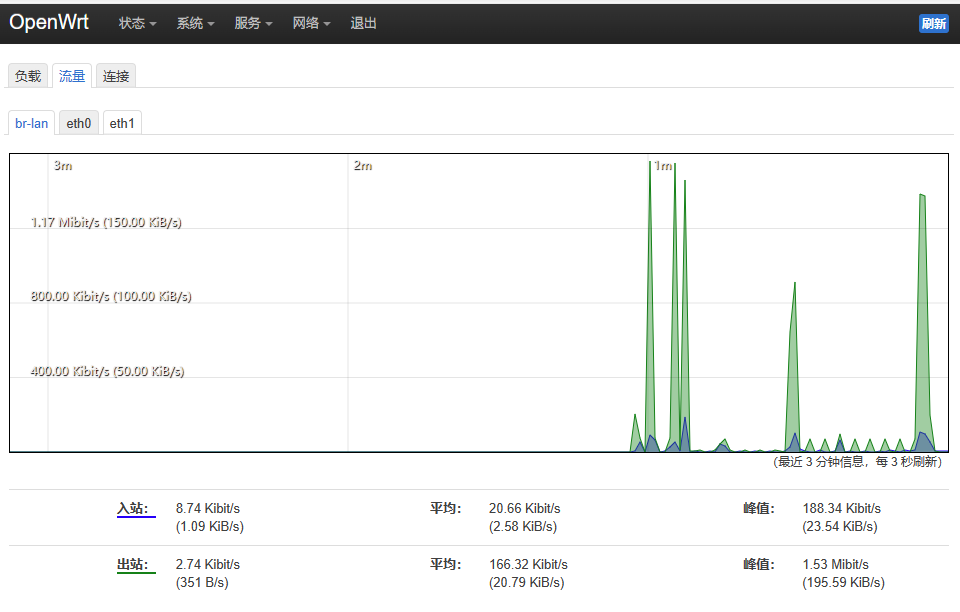
(二)流量
主要看看bridge-LAN的,反正在目前的网络架构中,其他地方的流量都缘于此,最后还是eth0和eth1的流量相加。
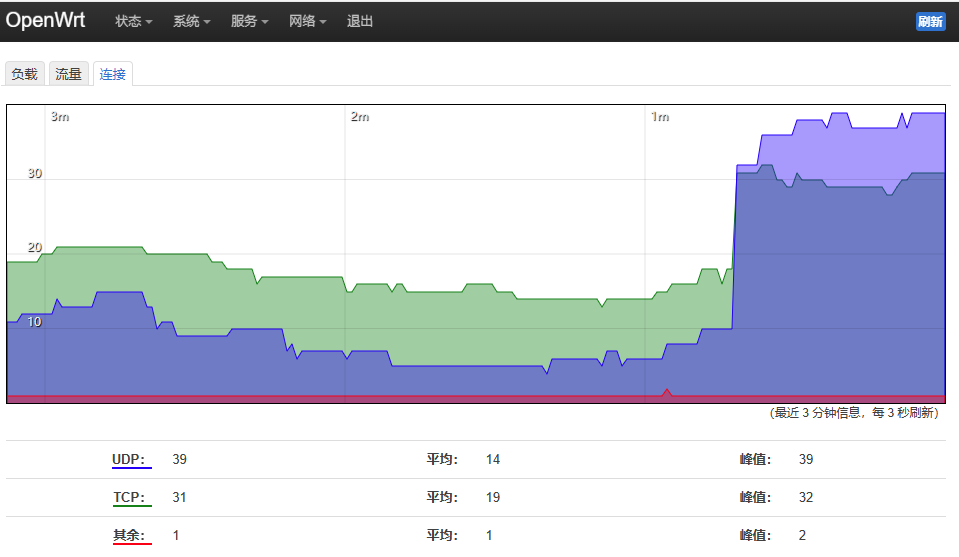
(三)连接
TCP/UDP连接统计,突然想起了Stevens的《UNIX network programming》……
五、下一步计划
在openWRT的软件包中加入目前支持较为完好的USB WiFi adapter驱动,使其能运行起来。
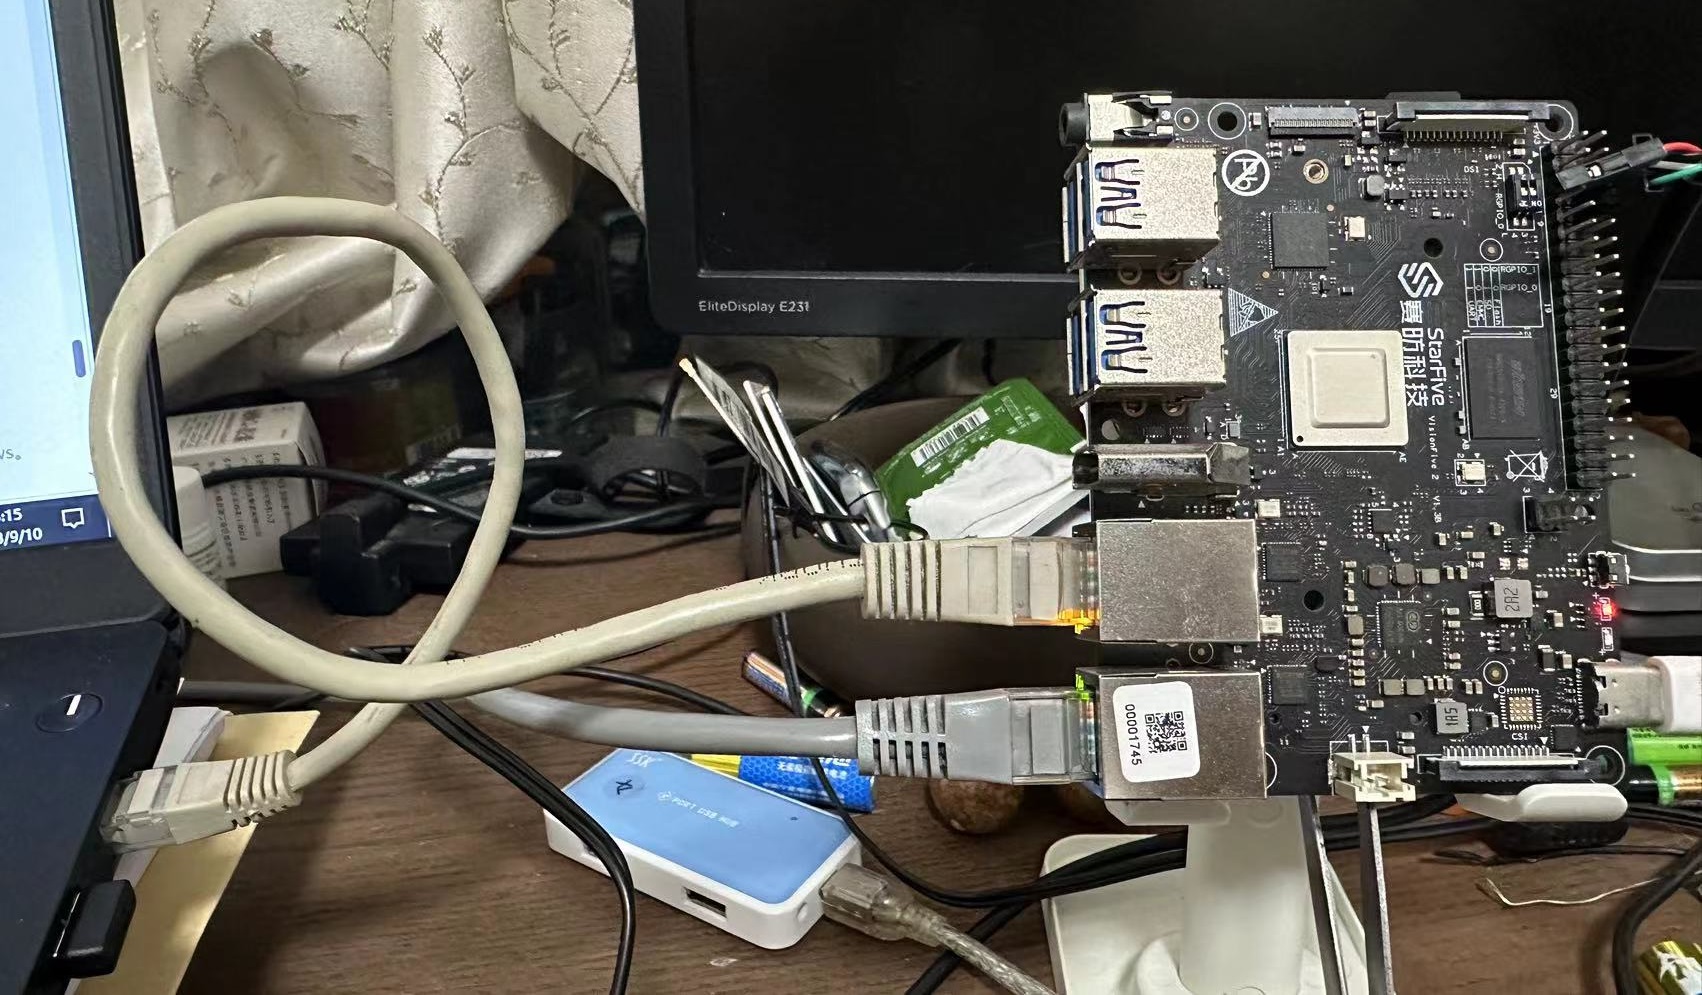
最后来一张合影。
|
评论